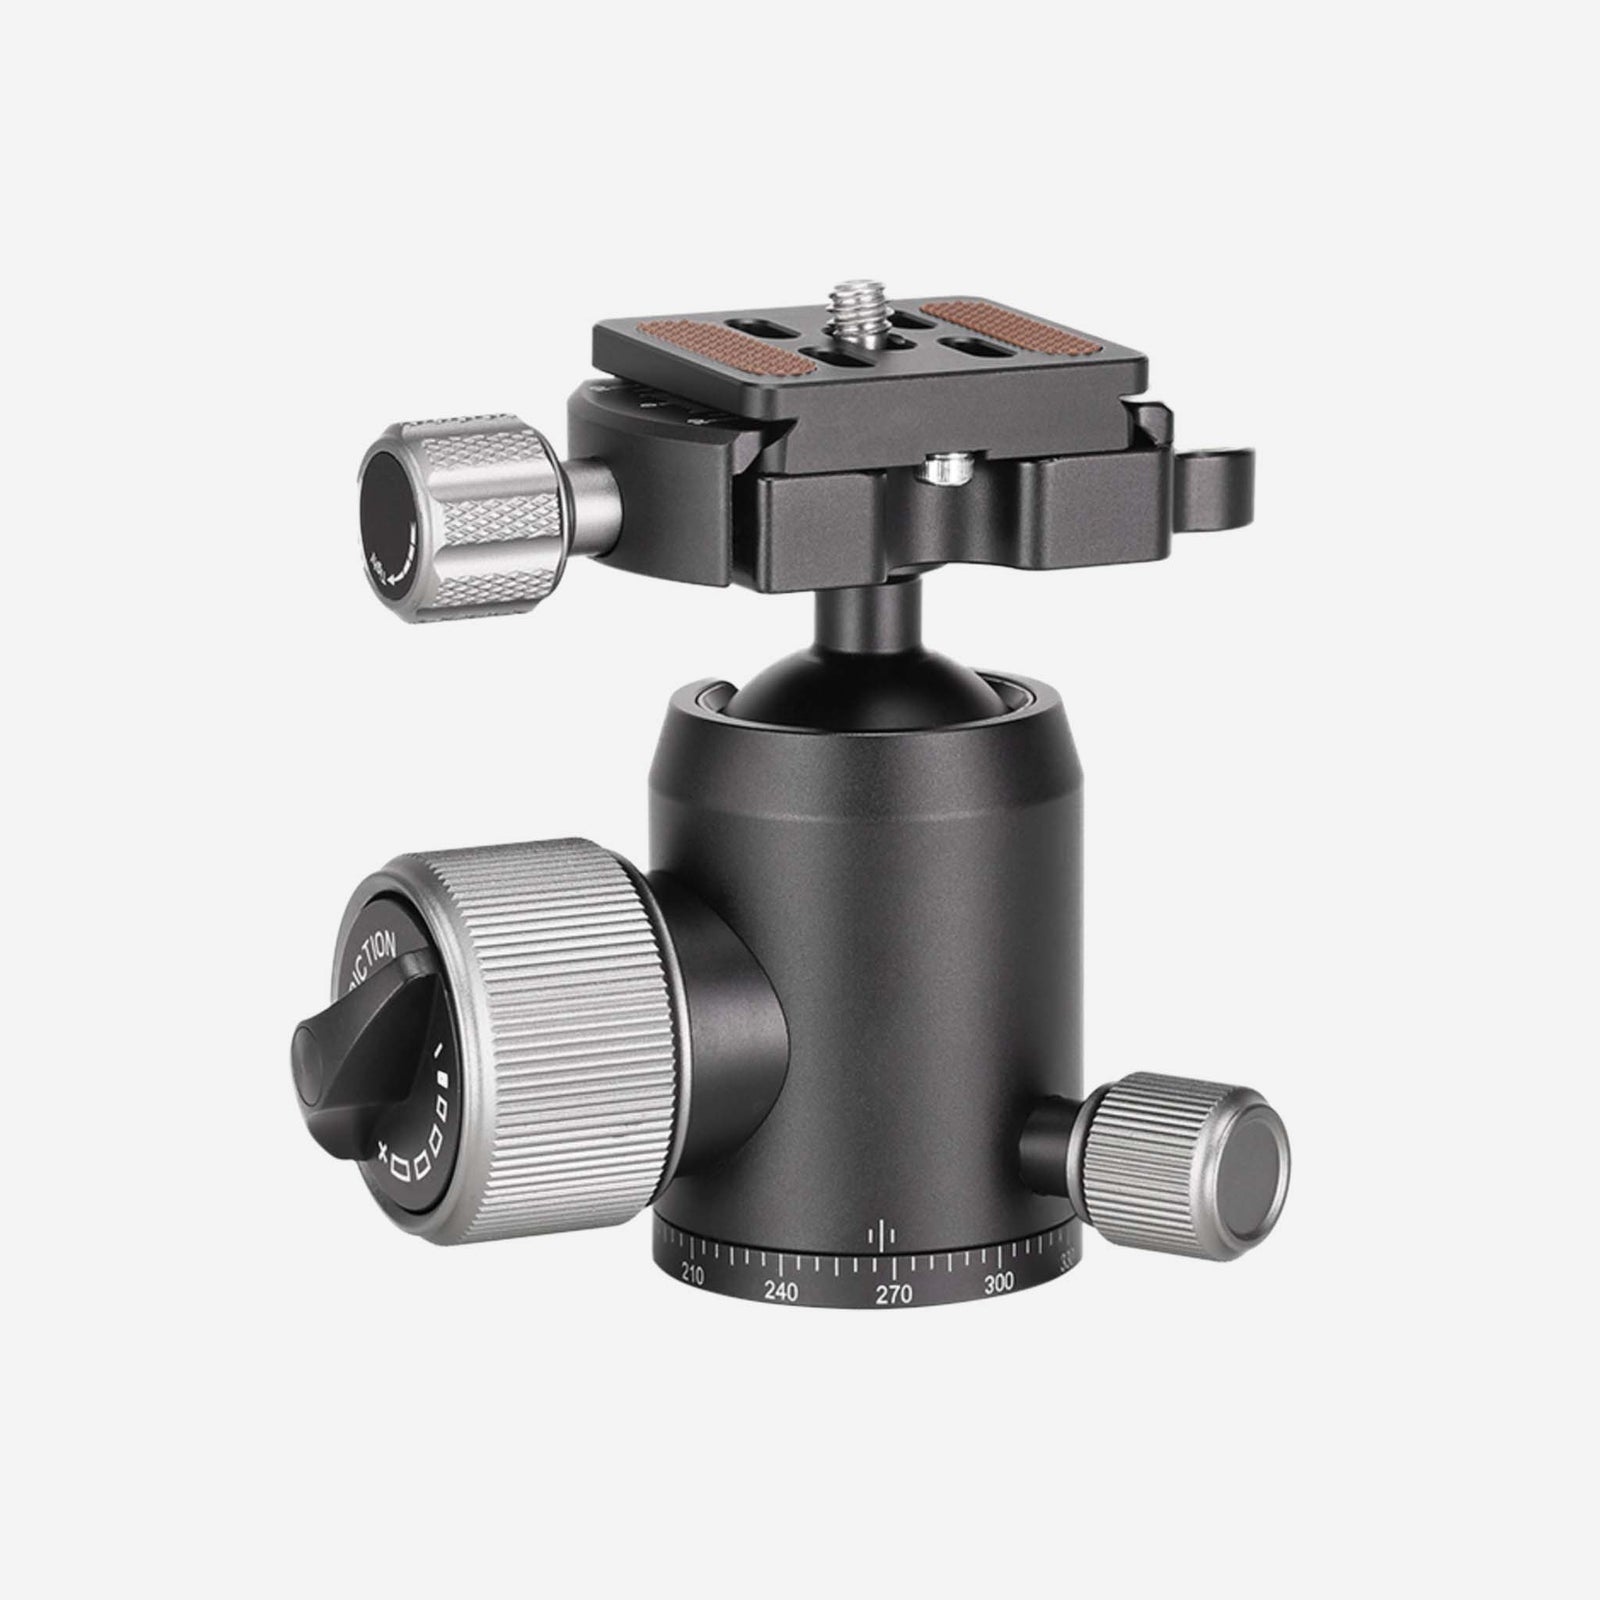


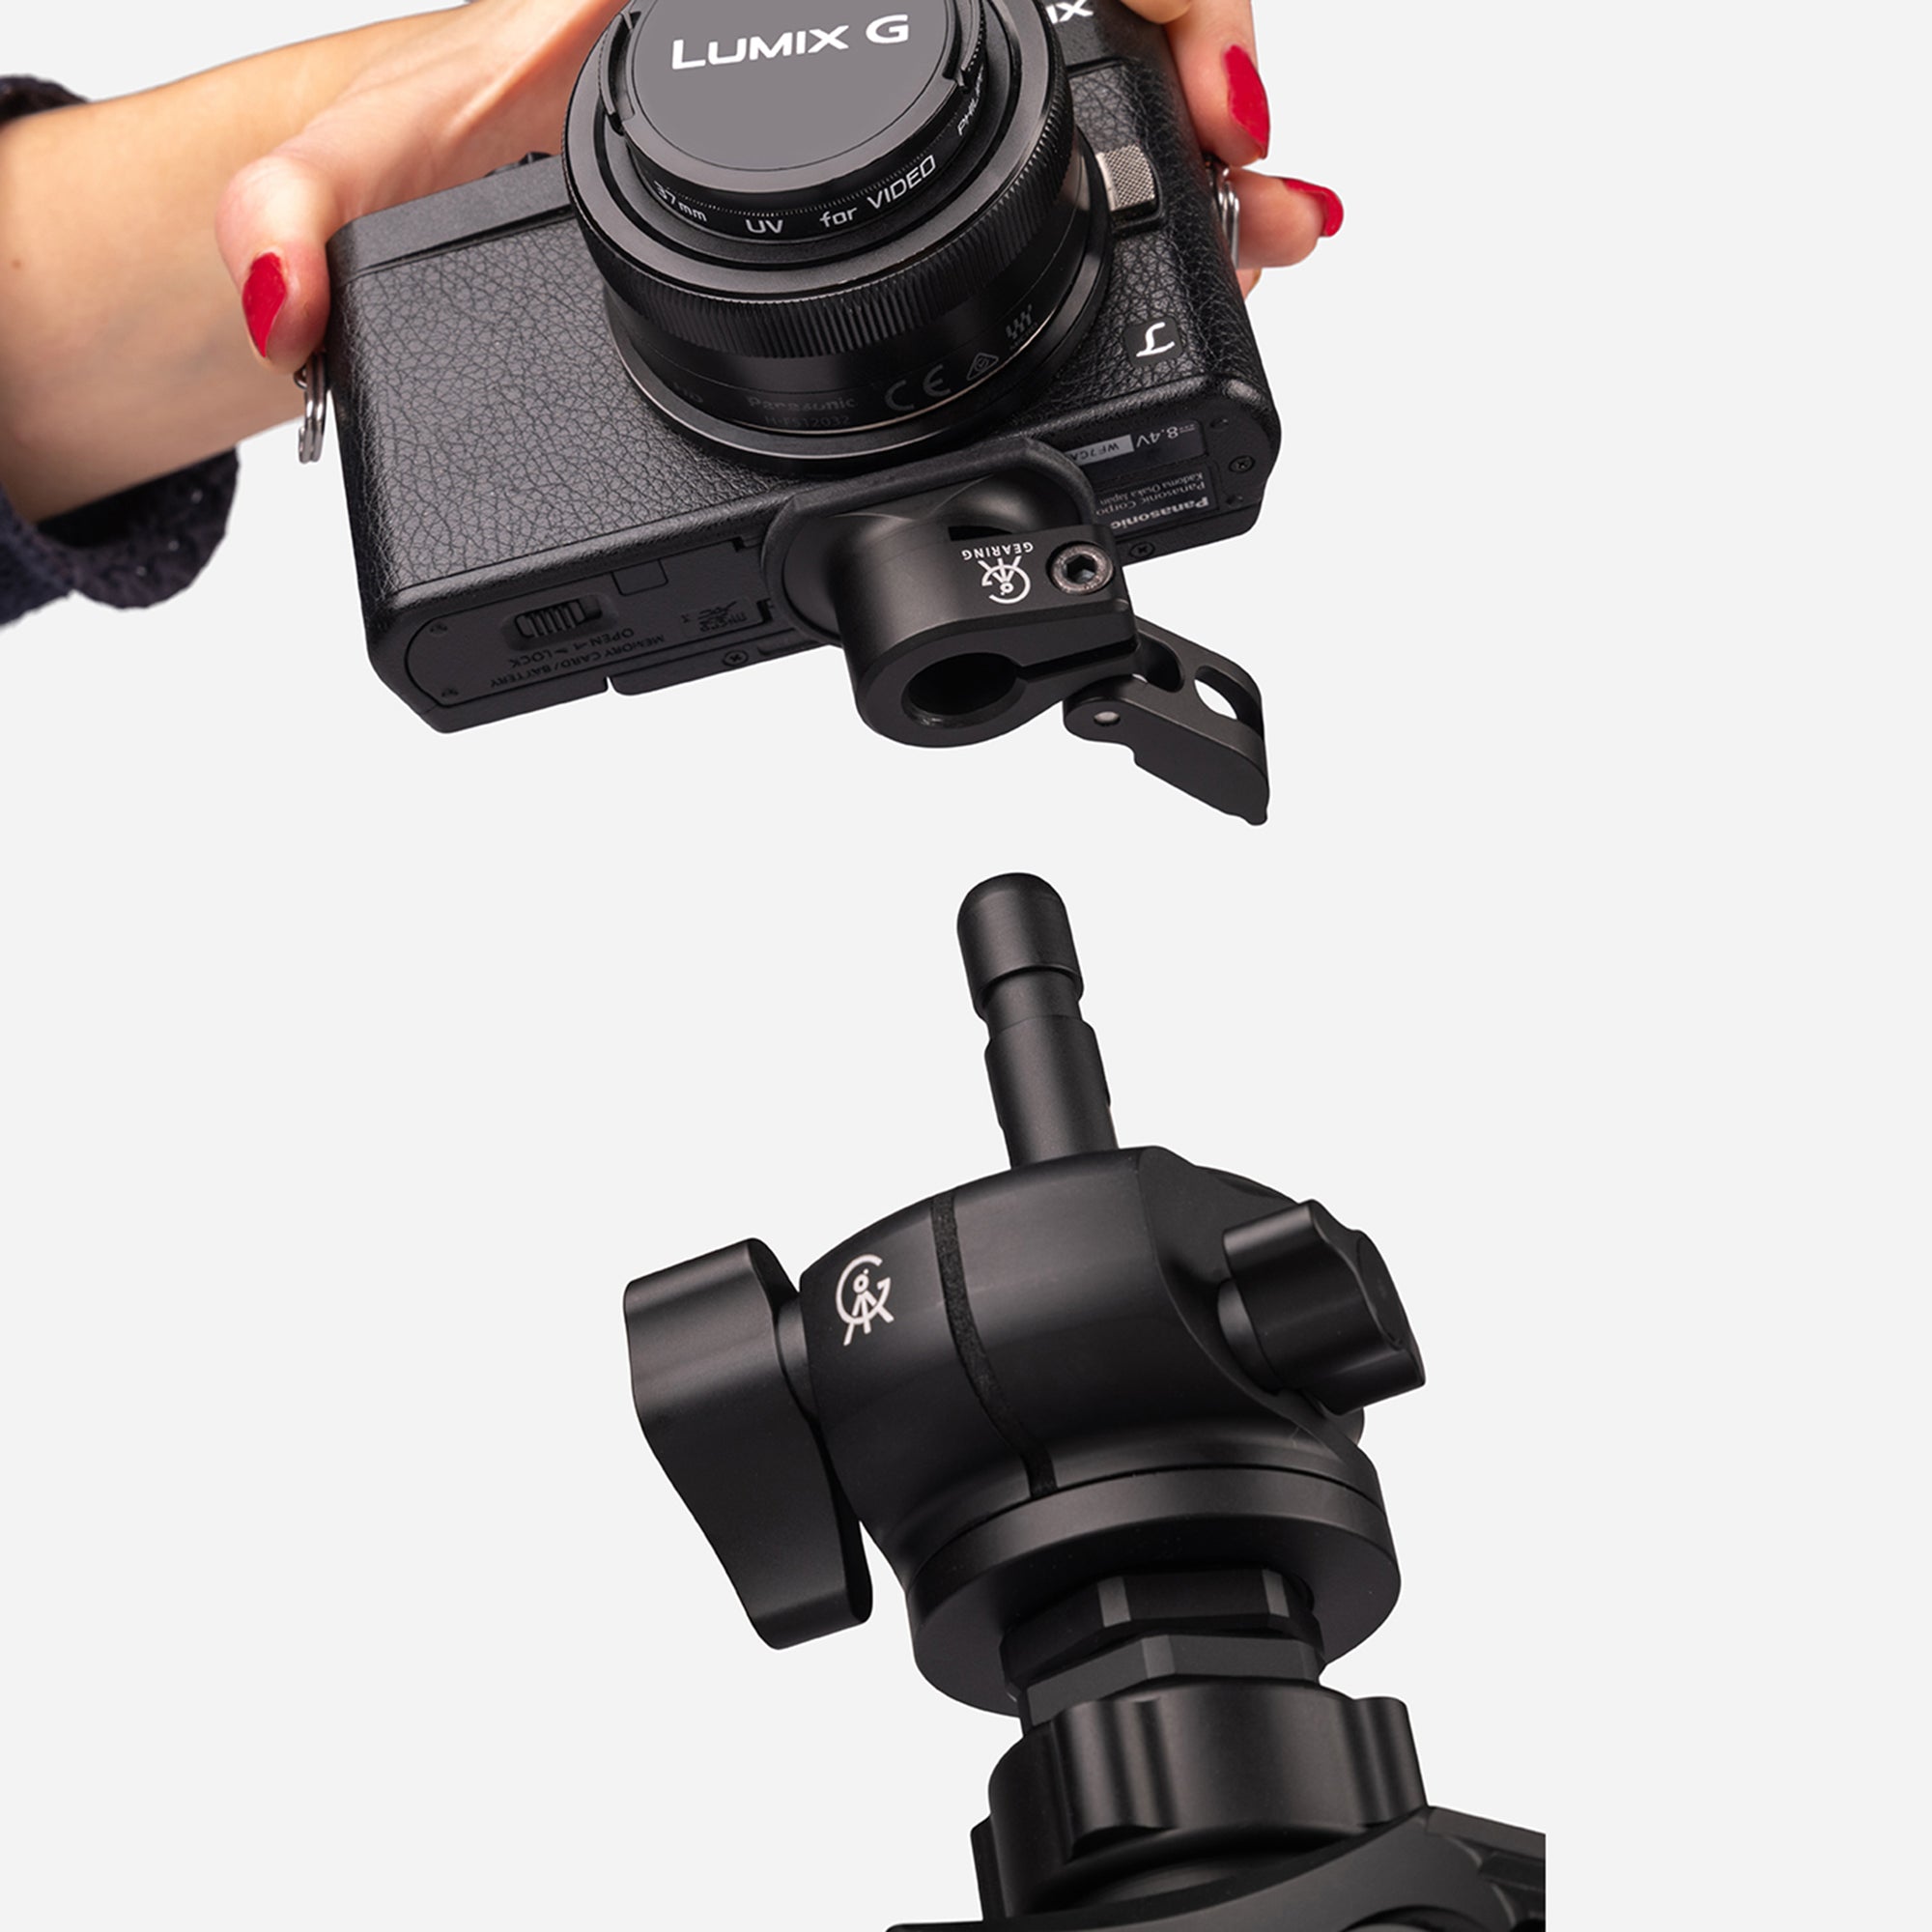
This ball head attaches magnetically to the light or heavy duty adapter via the spigot. It has both a pan tension knob and a ball tension knob.

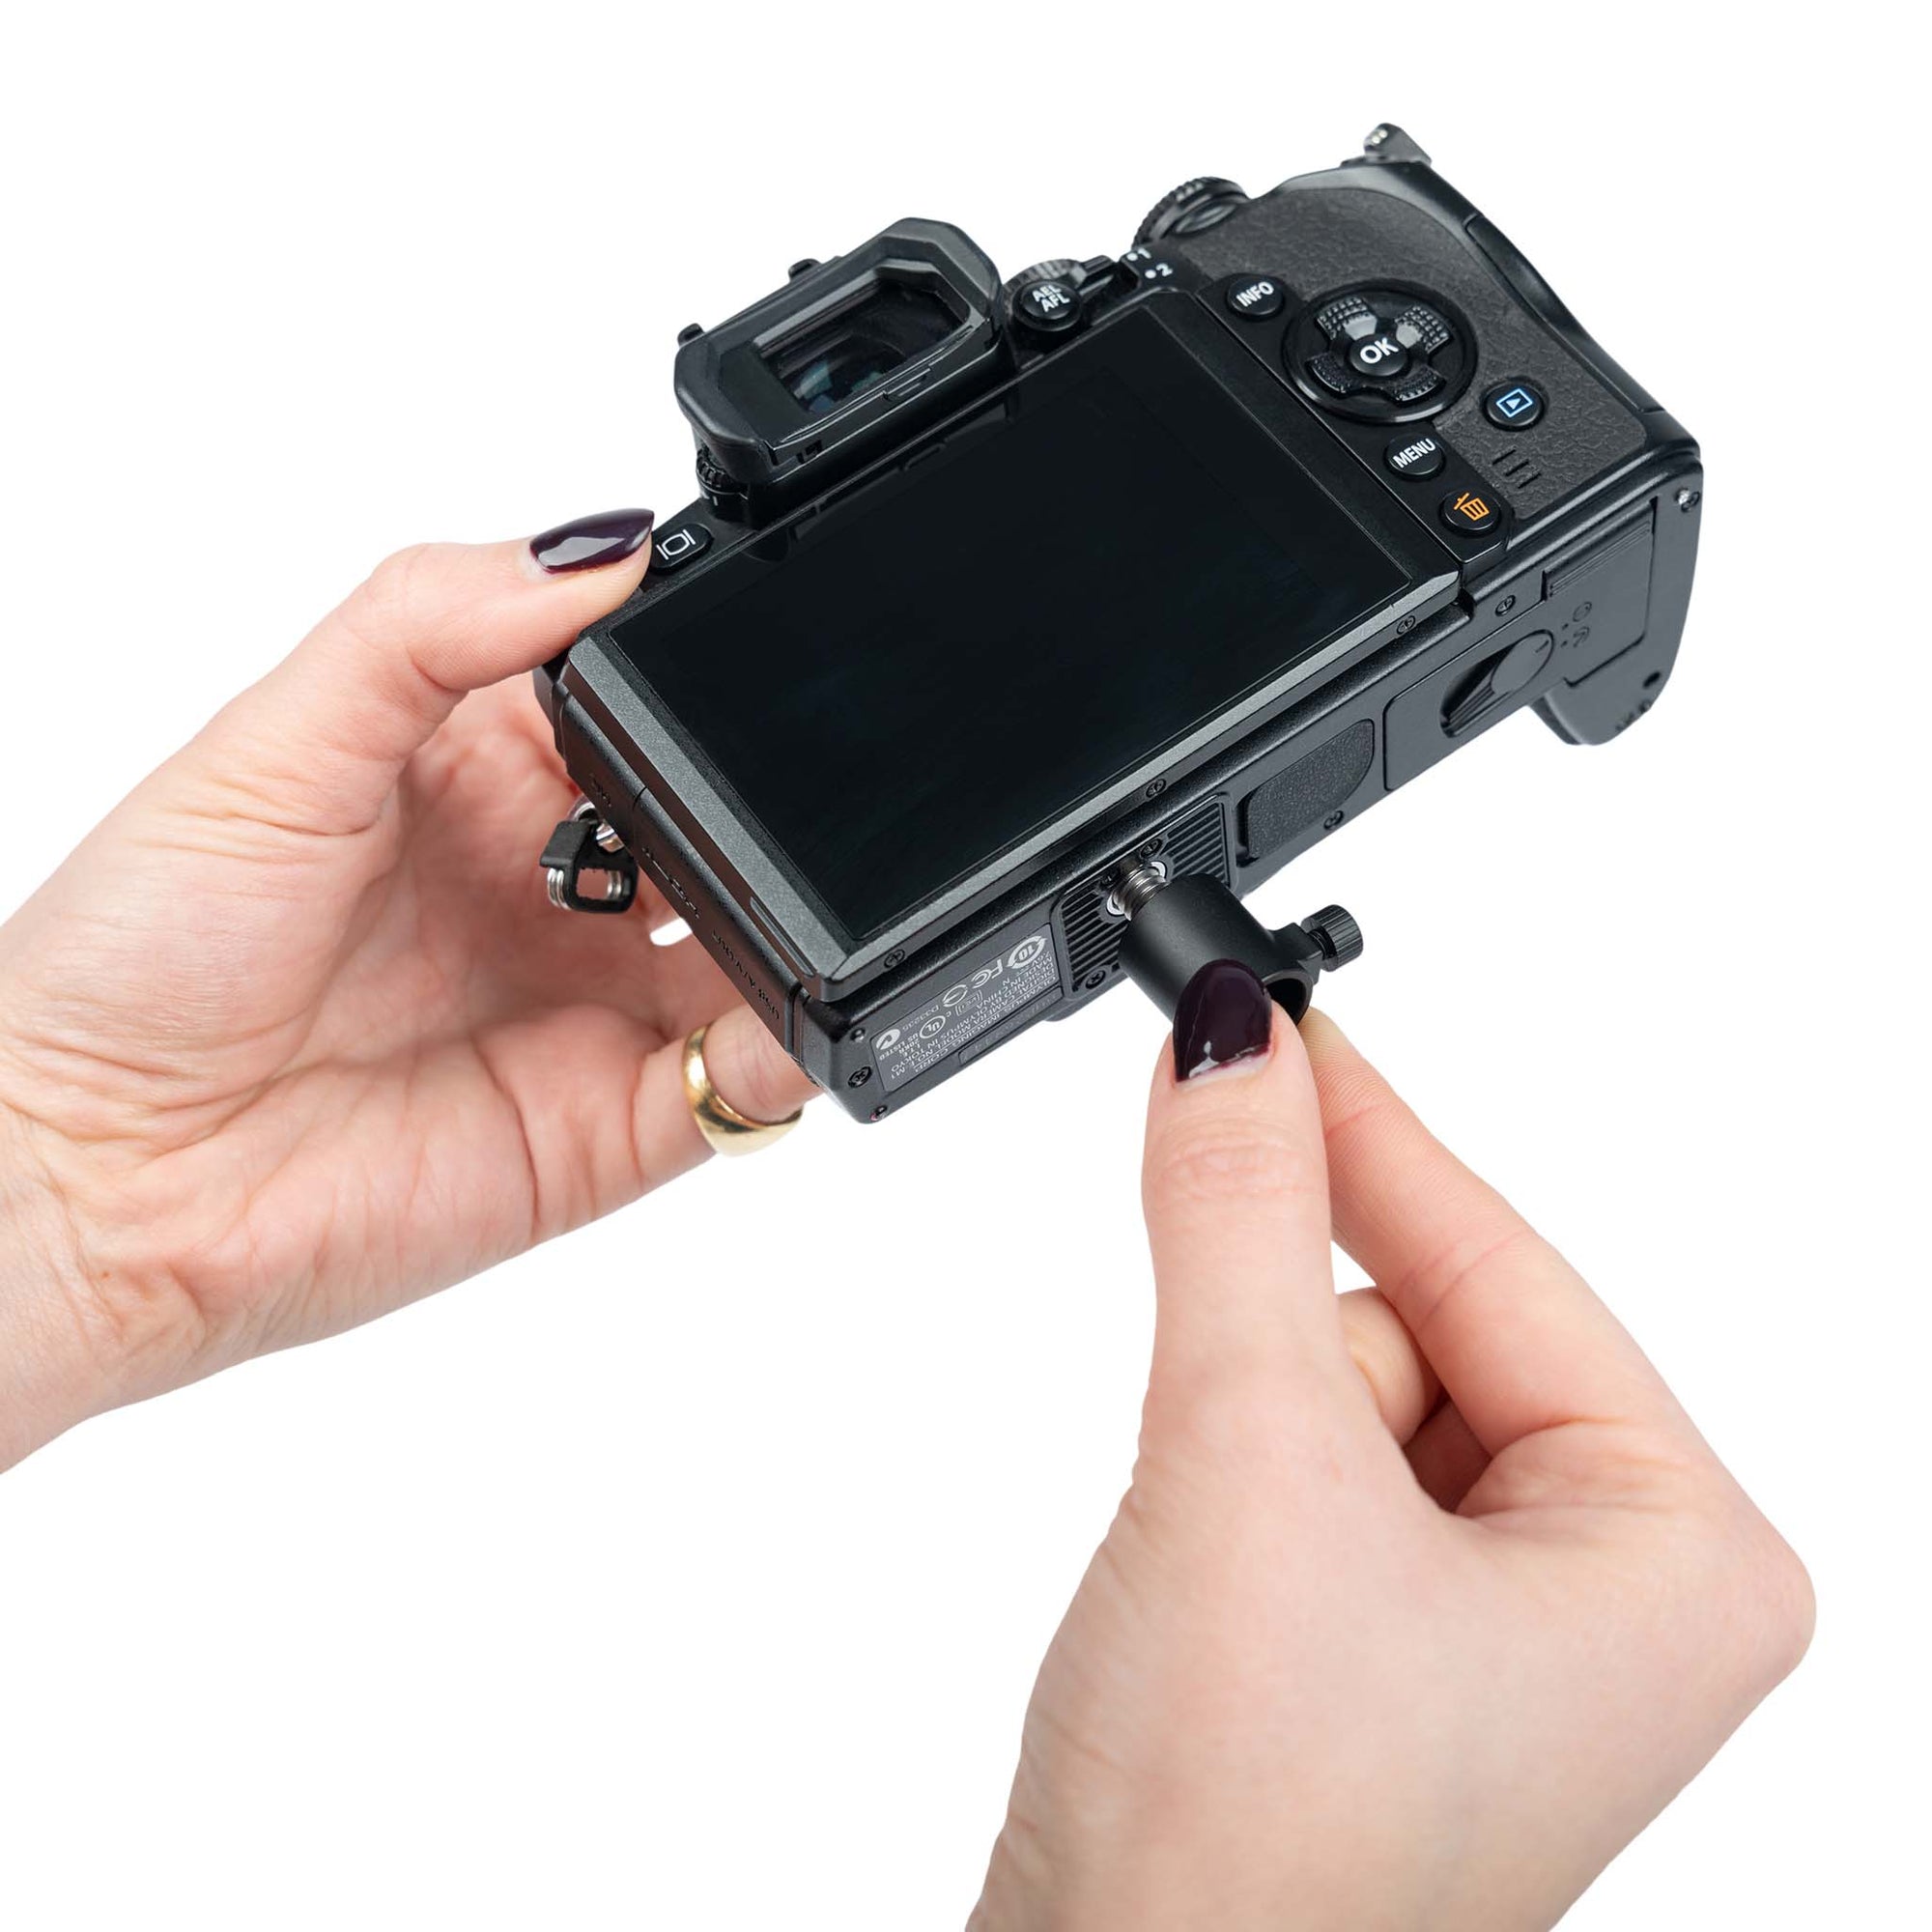
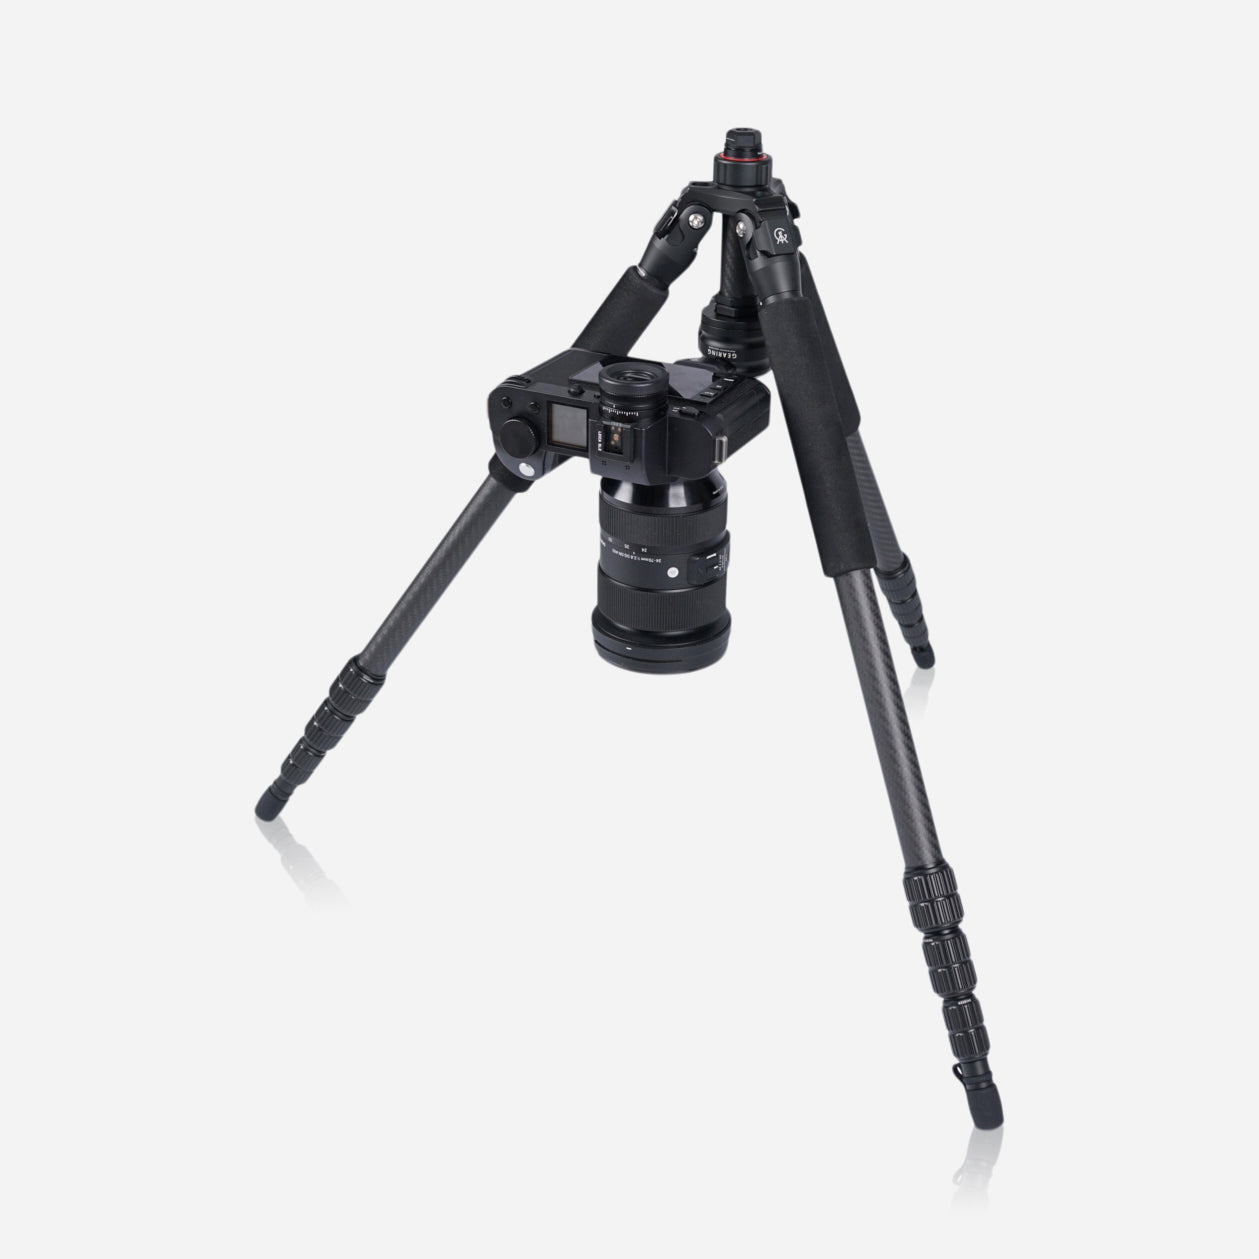
Our Gearing Pro Head attaches directly to the center column via an industry standard ¼” - 20 mounting screw. The head features an arca swiss adapter to give you the piece of mind to mount even the heaviest of Cameras. Our head units are designed with the user in mind and as such are ergonomic and intuitive.
For mounting, simply screw the gear head with the panning base fully tightened clockwise onto your tripod.
To loosen the panning base, turn the knob anticlockwise and rotate the head to the desired angle. Keep a hold of your camera whilst rotating the head. Once you have reached the desired angle, turn the knob clockwise.
Features an integrated ten-piece screwdriver kit which can be used to make adjustments to your camera gear and your Gearing equipment.
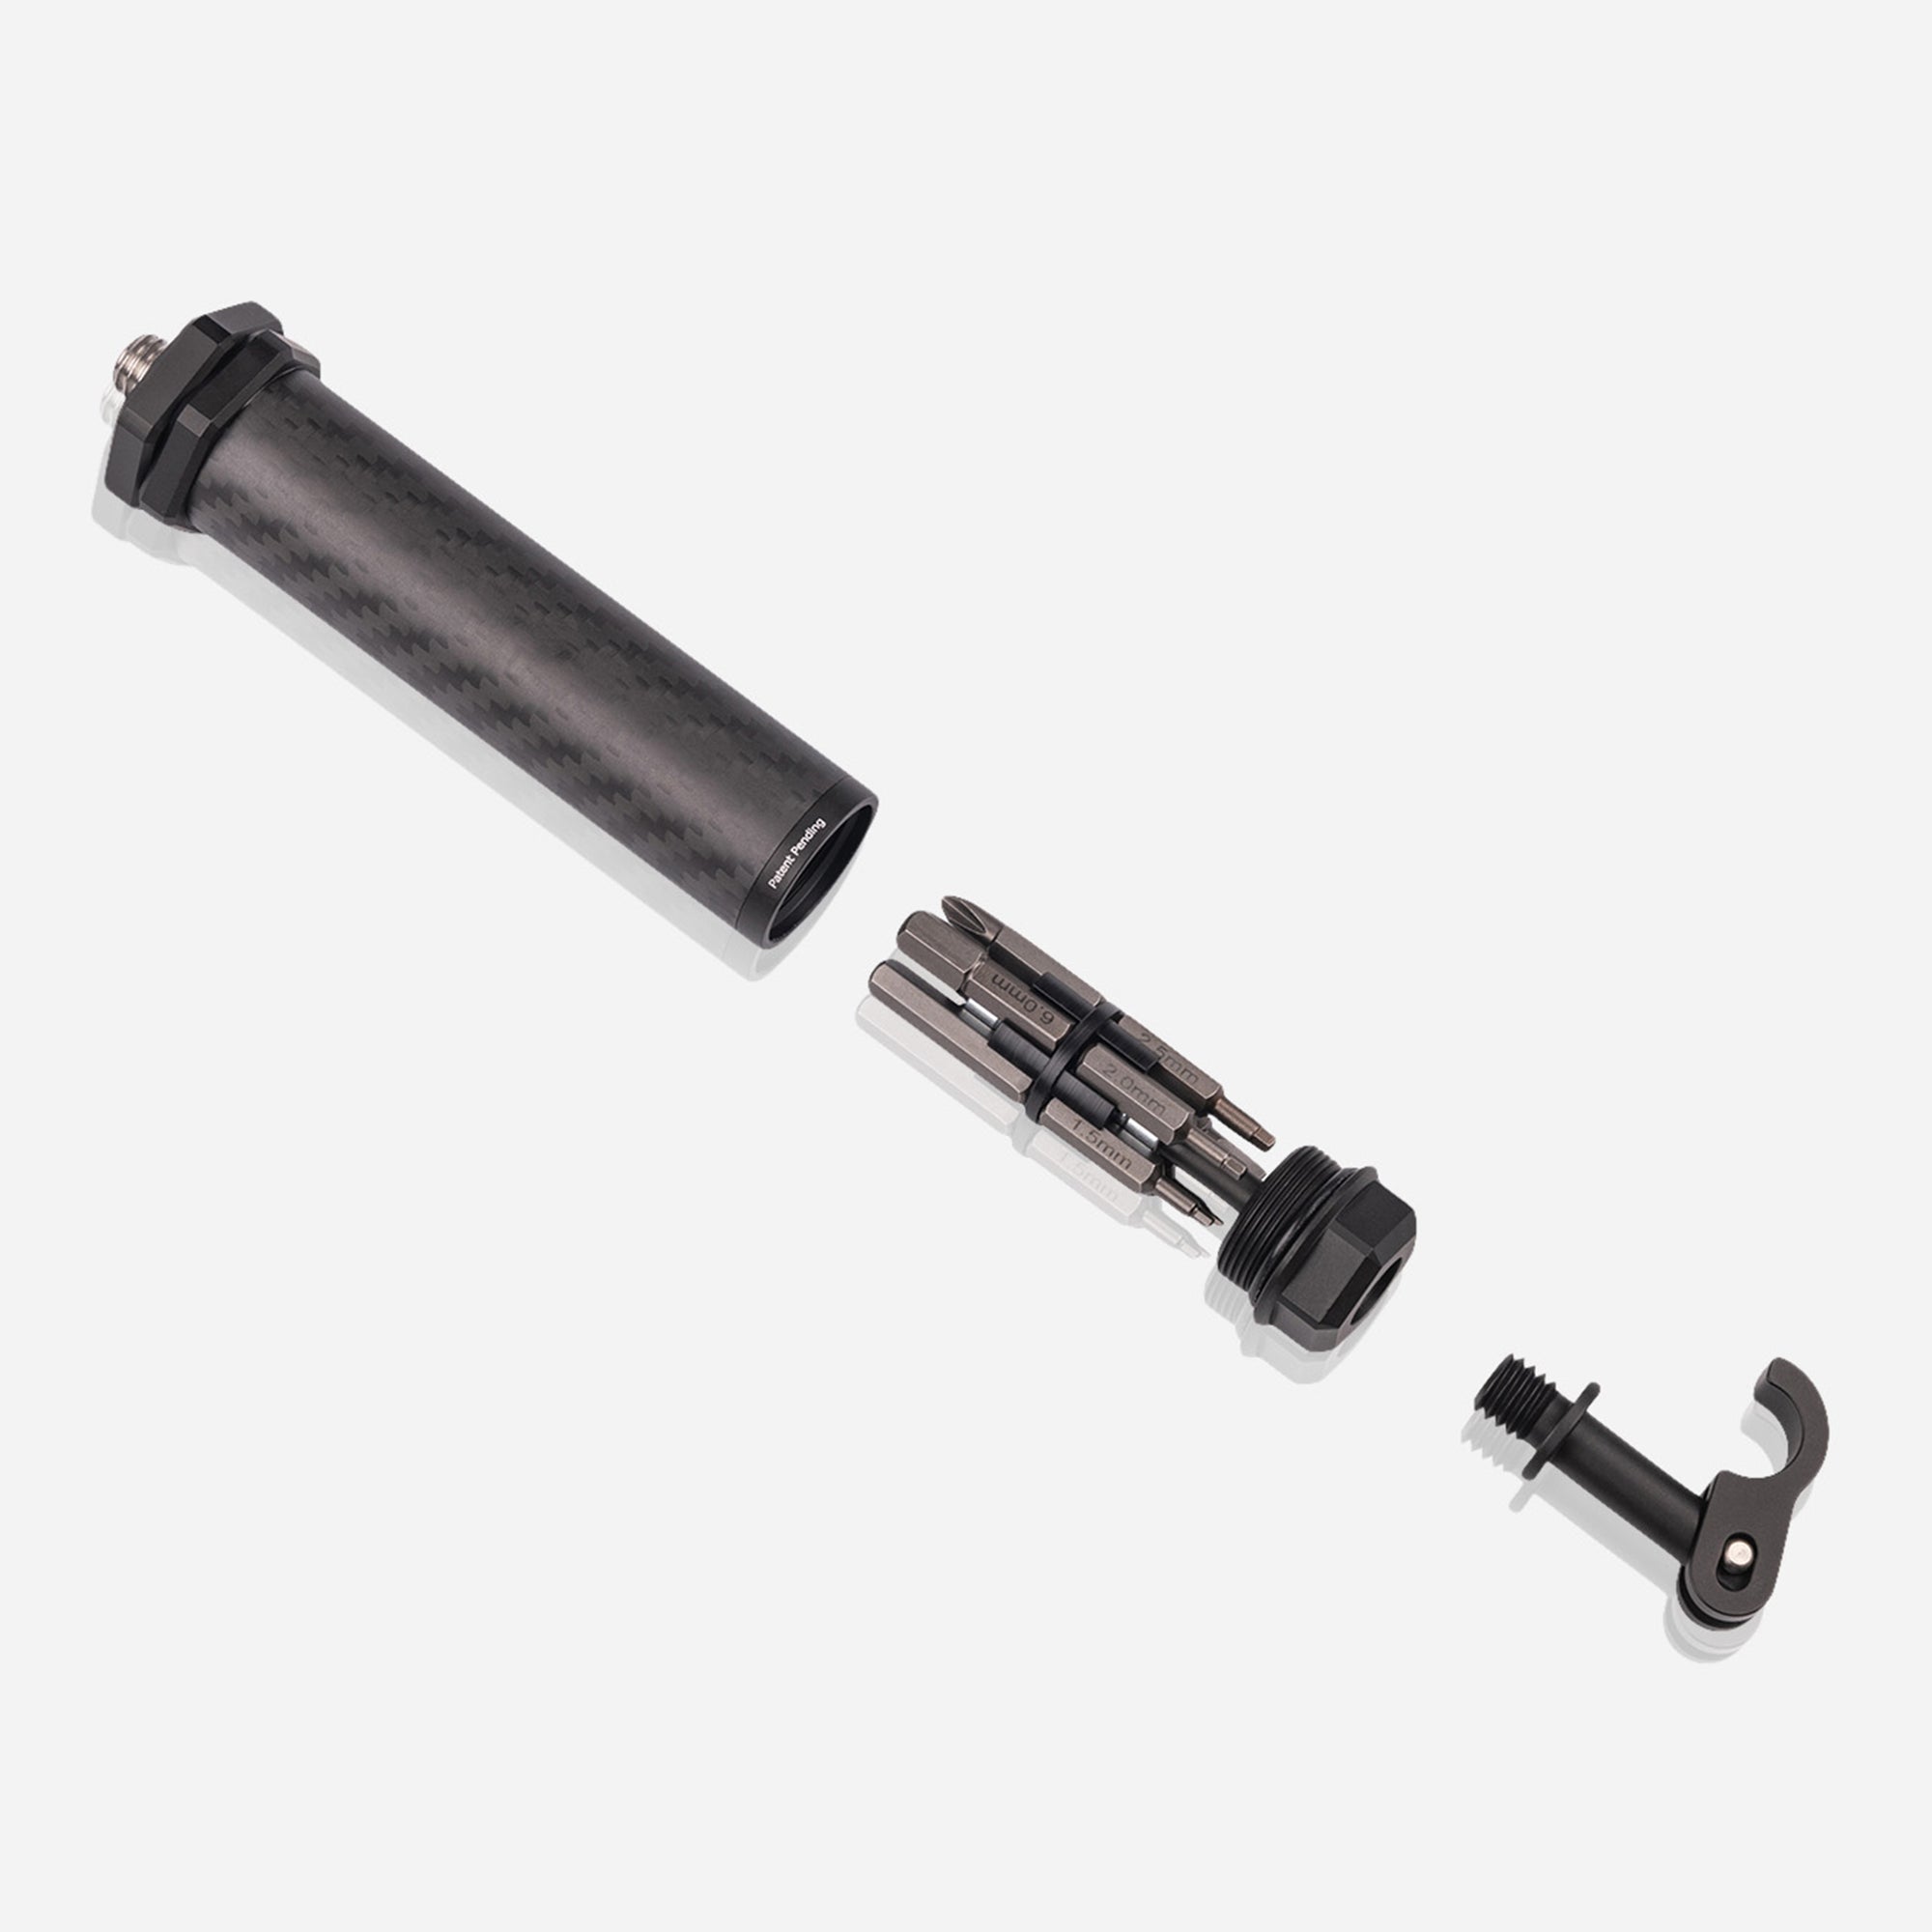
Use the 3mm hex head from the screwdriver kit to install the heavy duty adapter to your camera.
To secure the camera to the pro head, insert the spigot into the adapter and close the latch.
The light duty adapter can be mounted to any lightweight camera, optic or accessory via the ¼” thread.
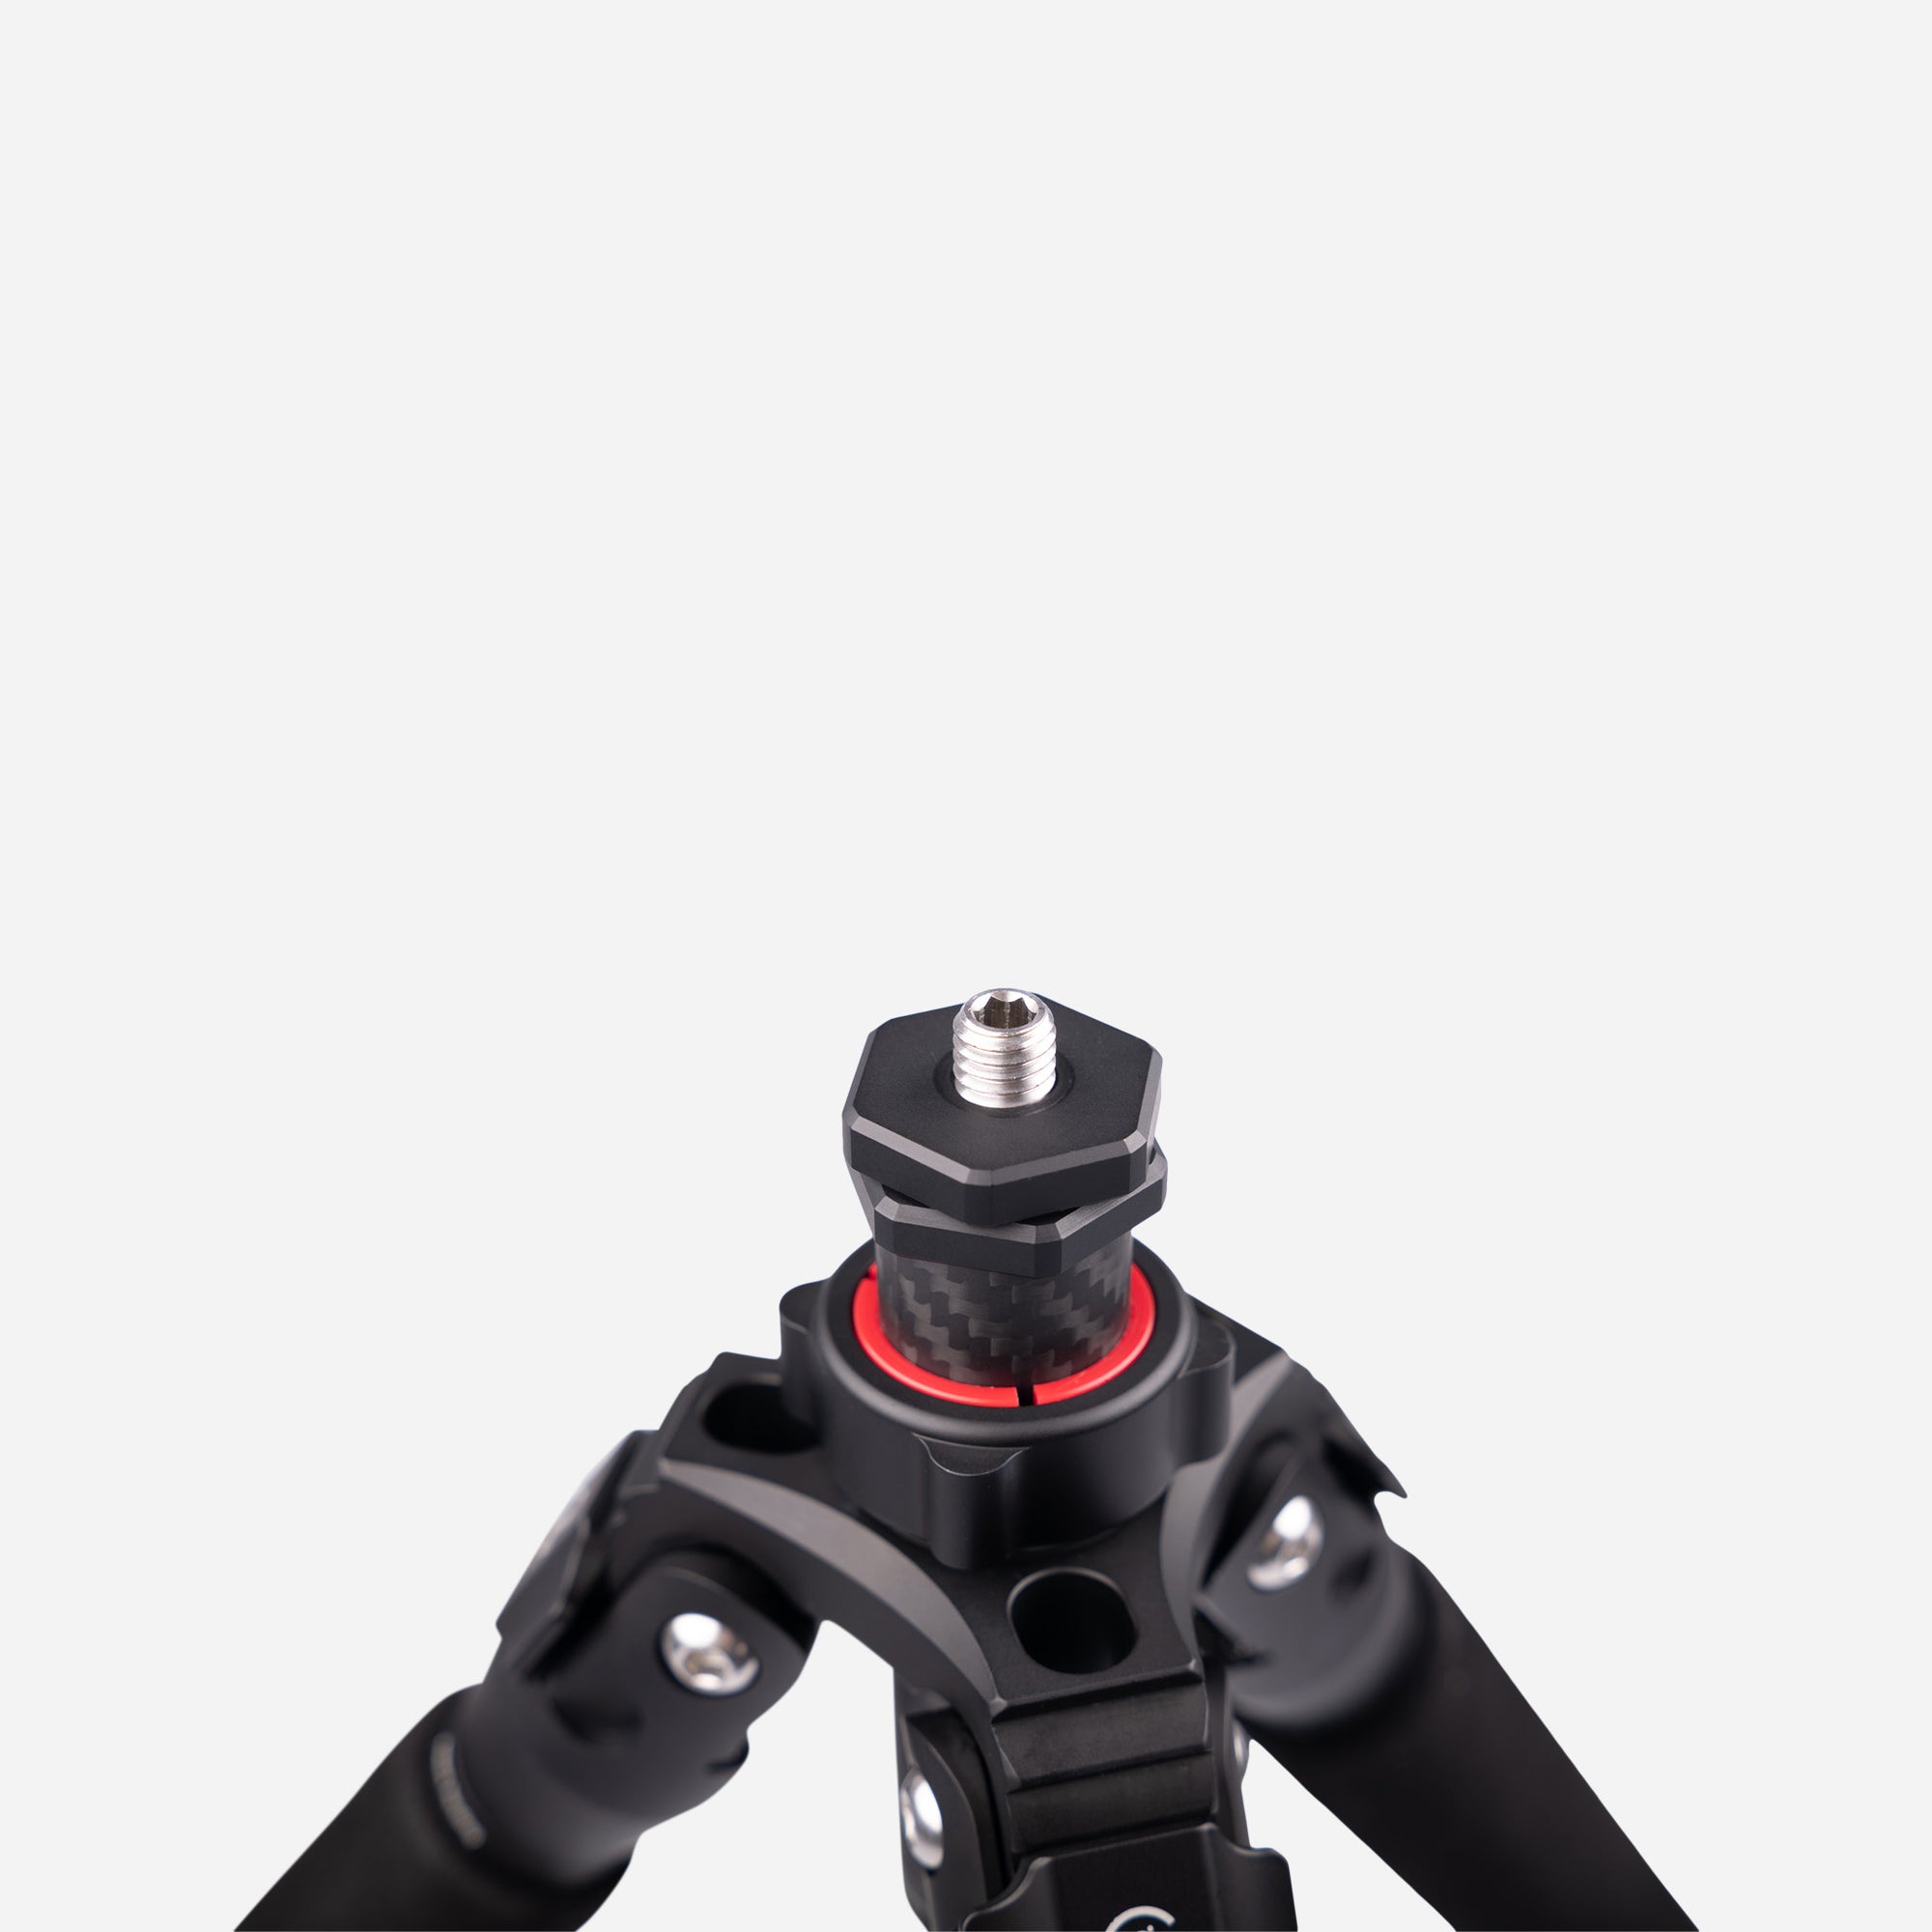
The centre column connects to our ball heads or third party pan or ball heads via the ⅜” thread. It is then inserted into the heart unit and locked via the tension ring.
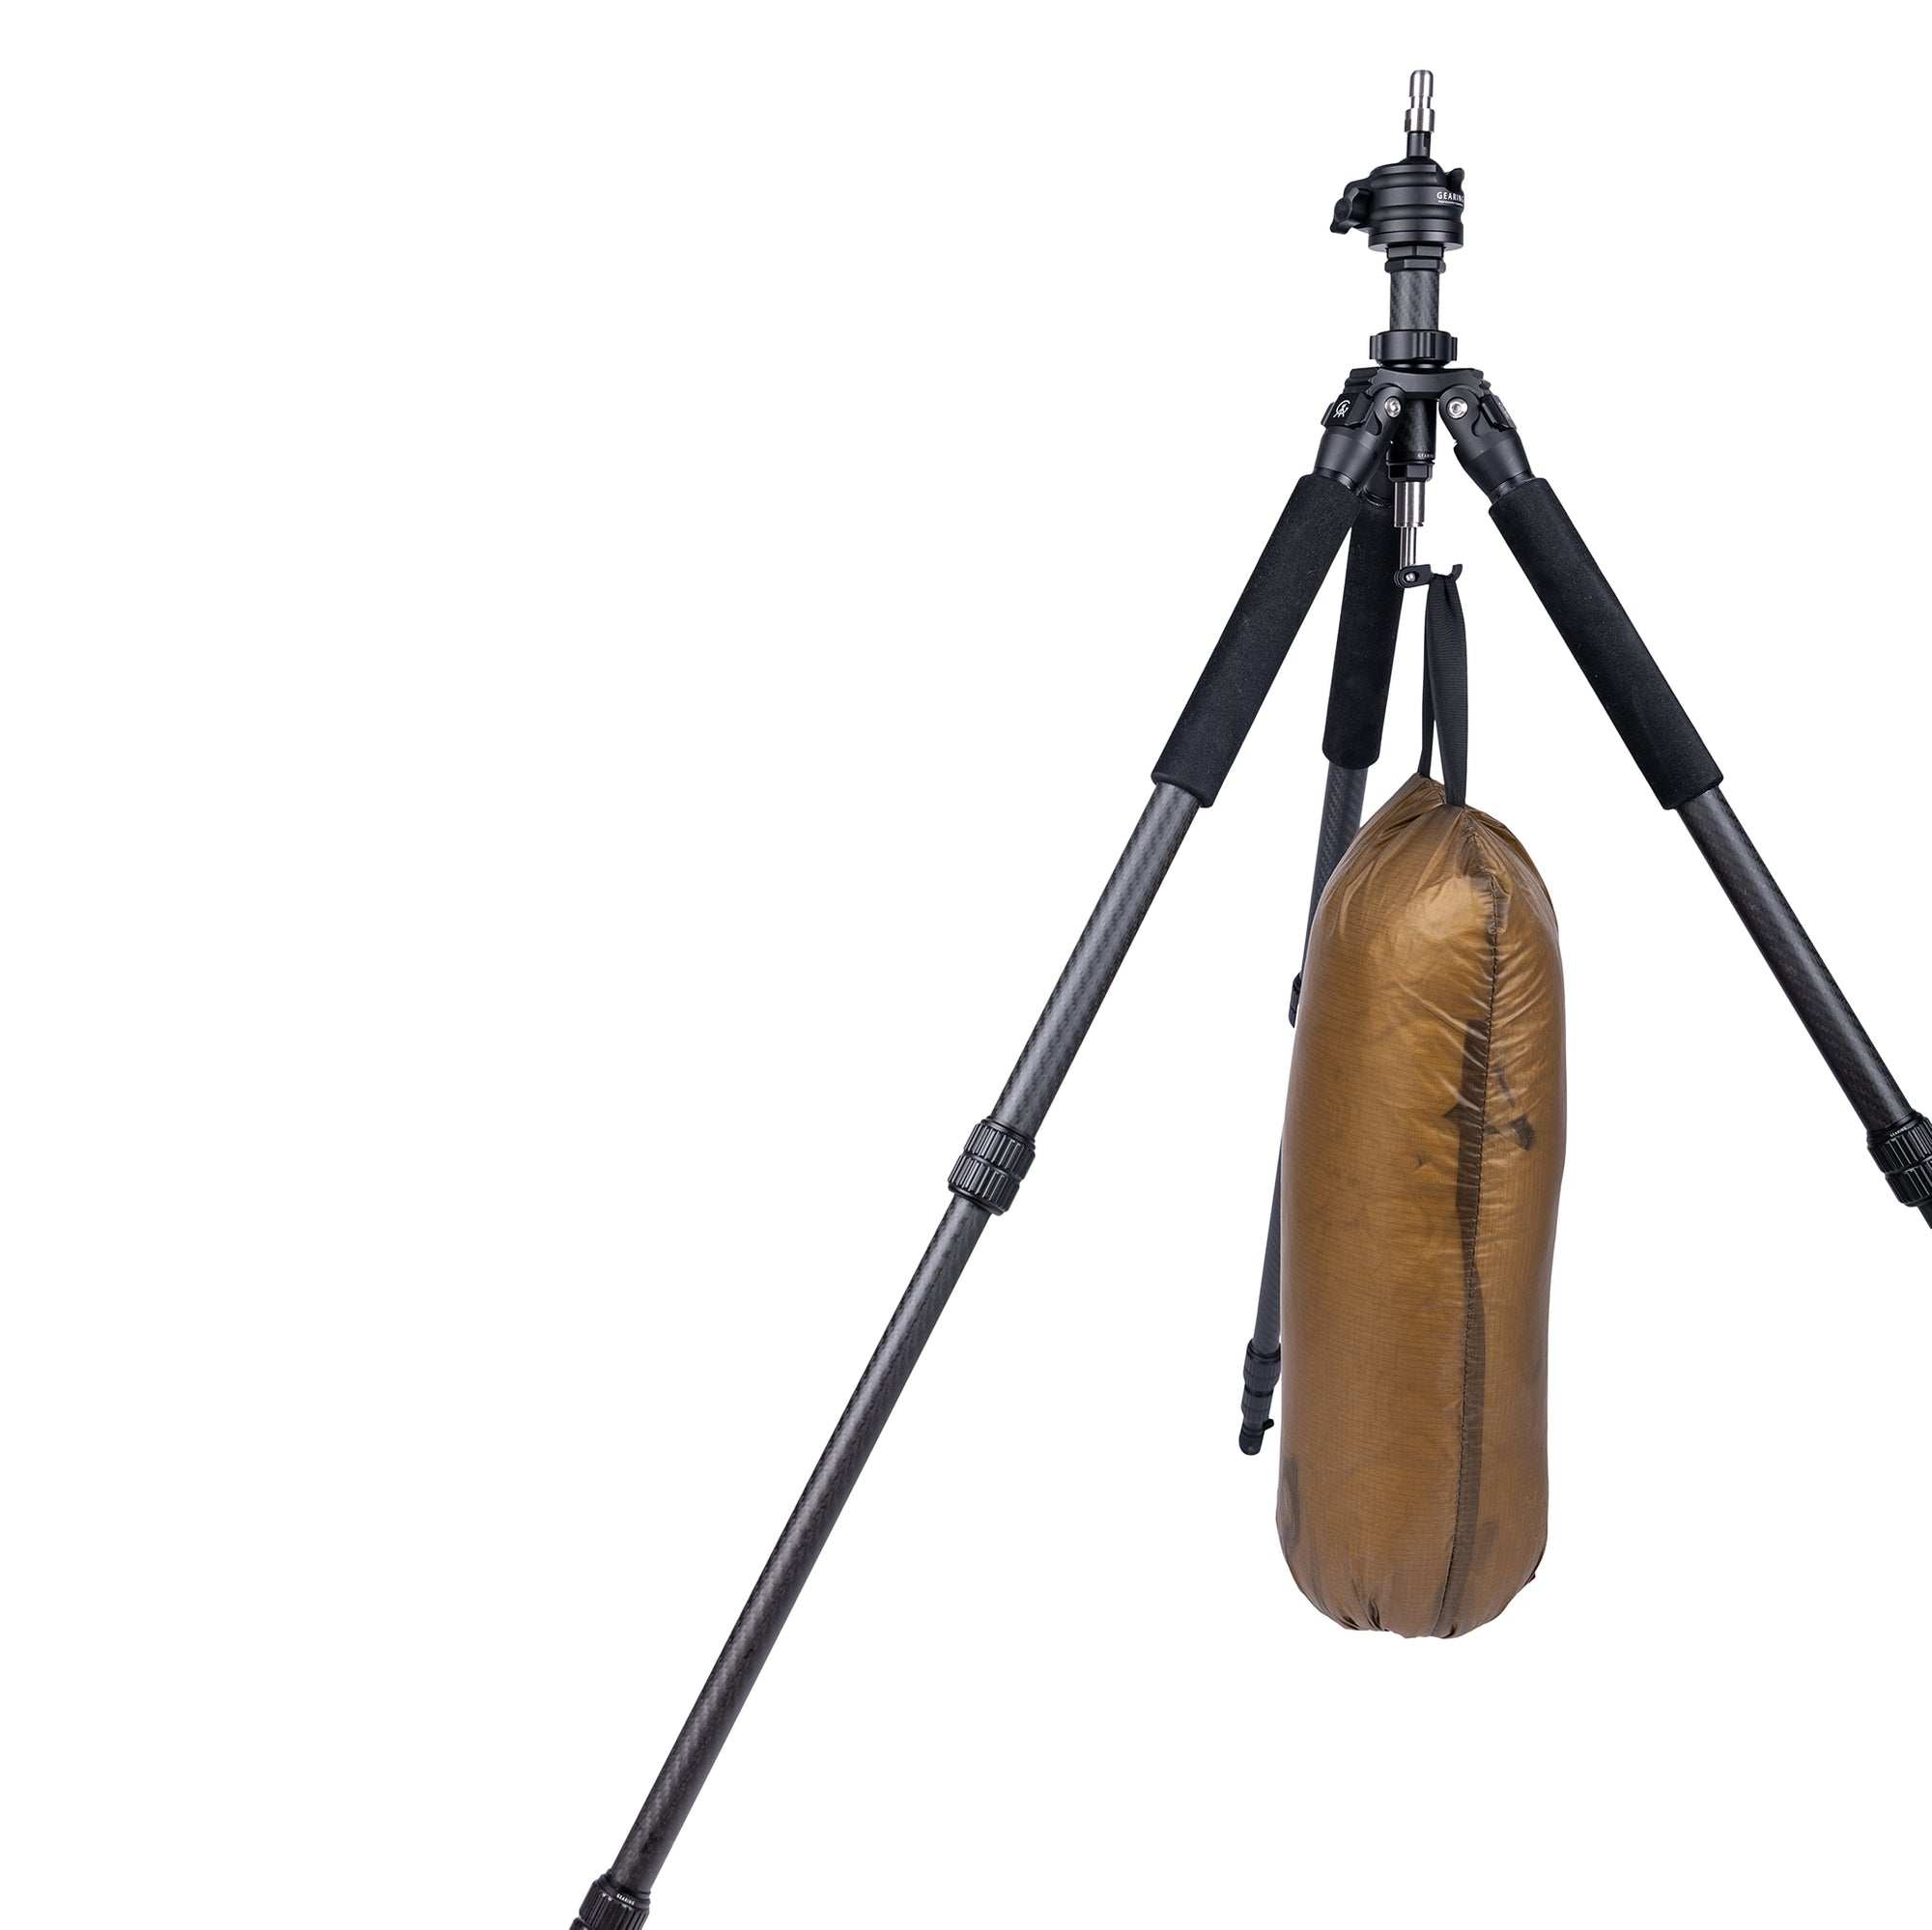
The tripod hook can be added or removed when required.
Bags and weights can be hung from the aluminium hook to further increase stability.
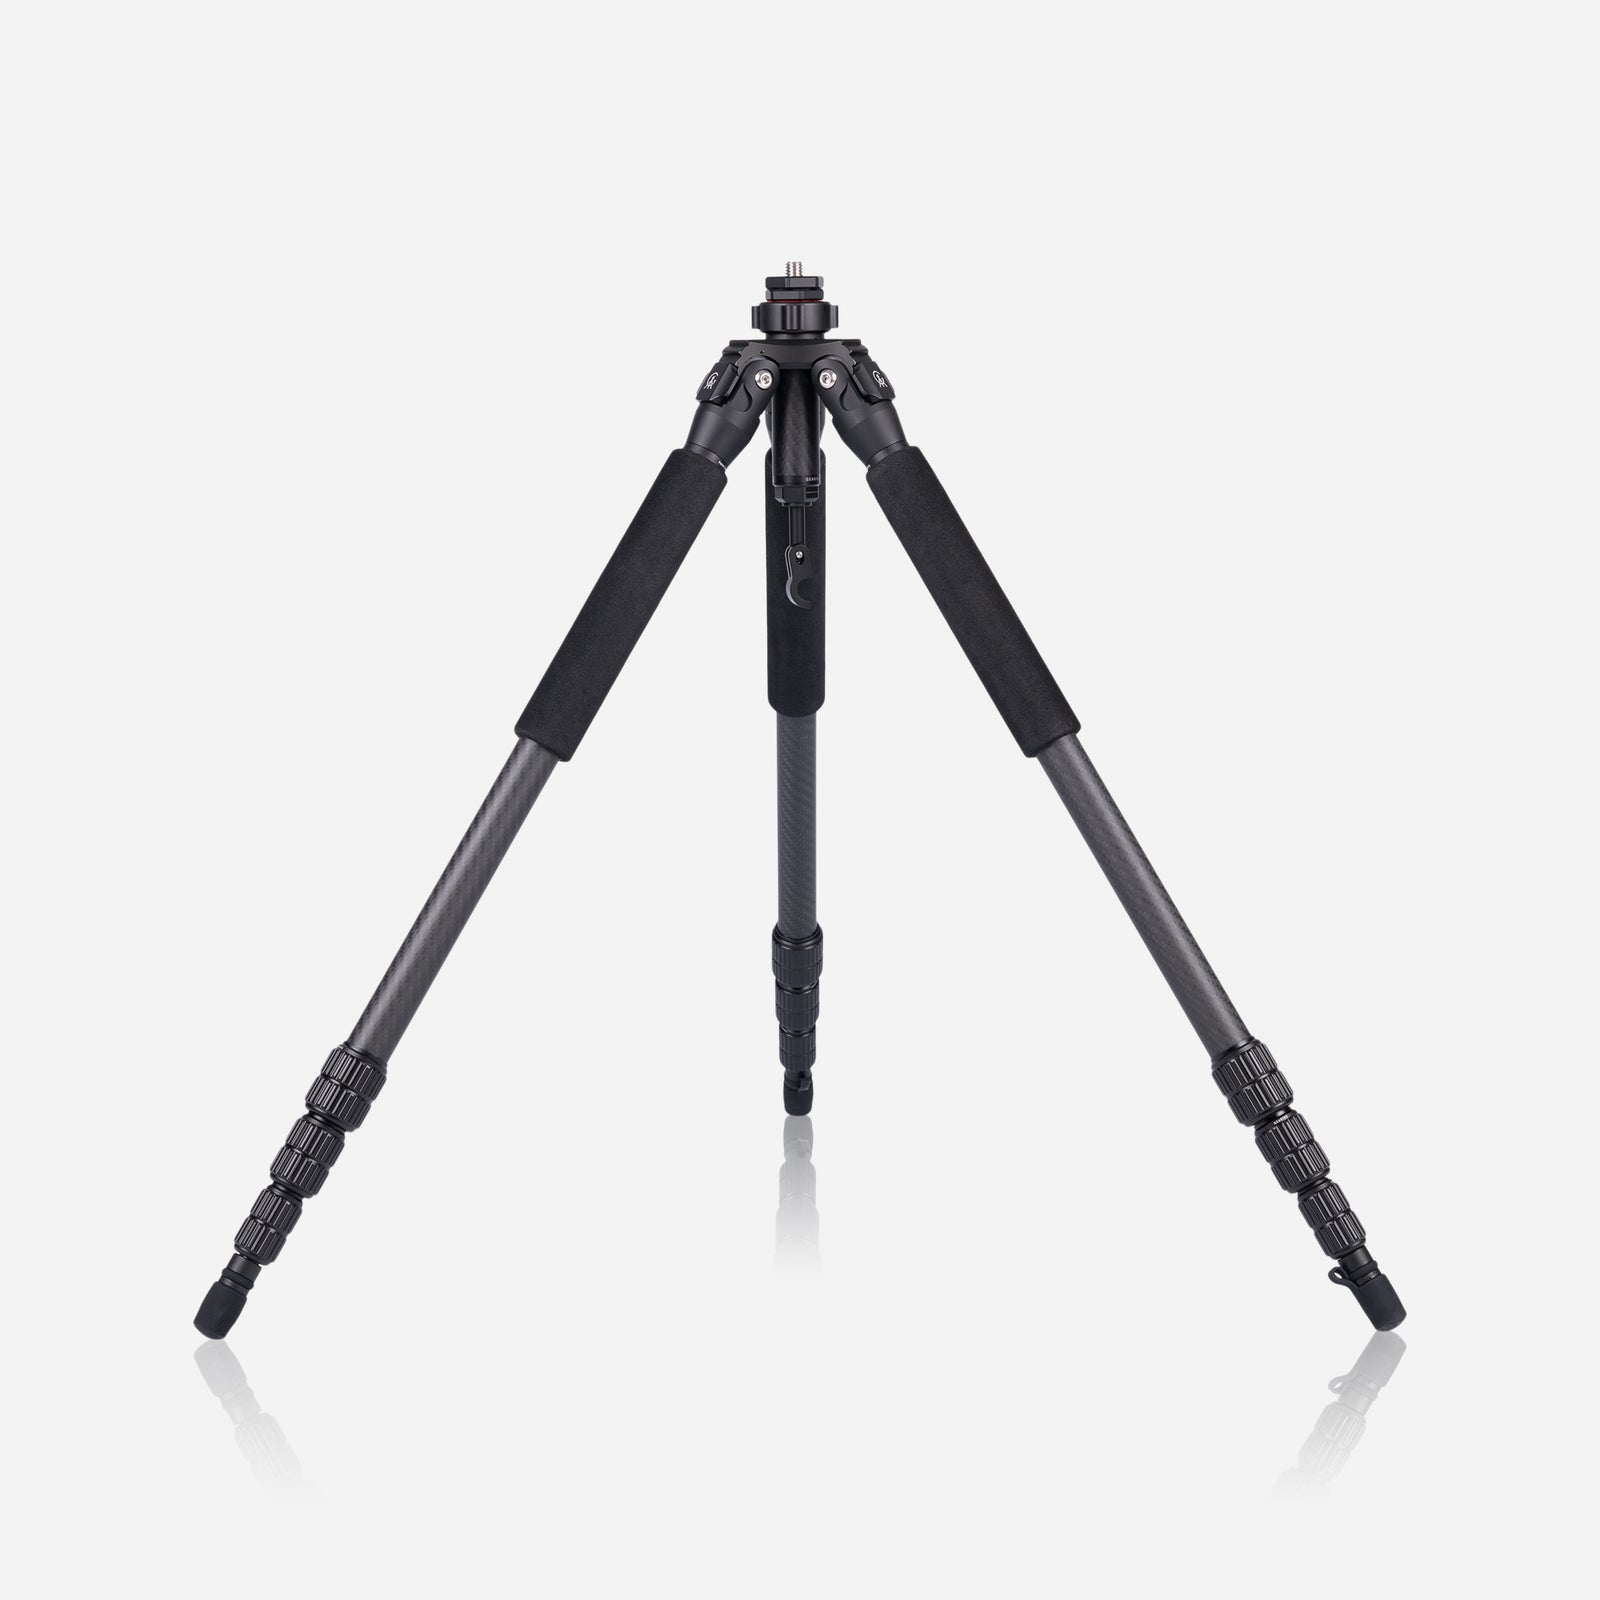
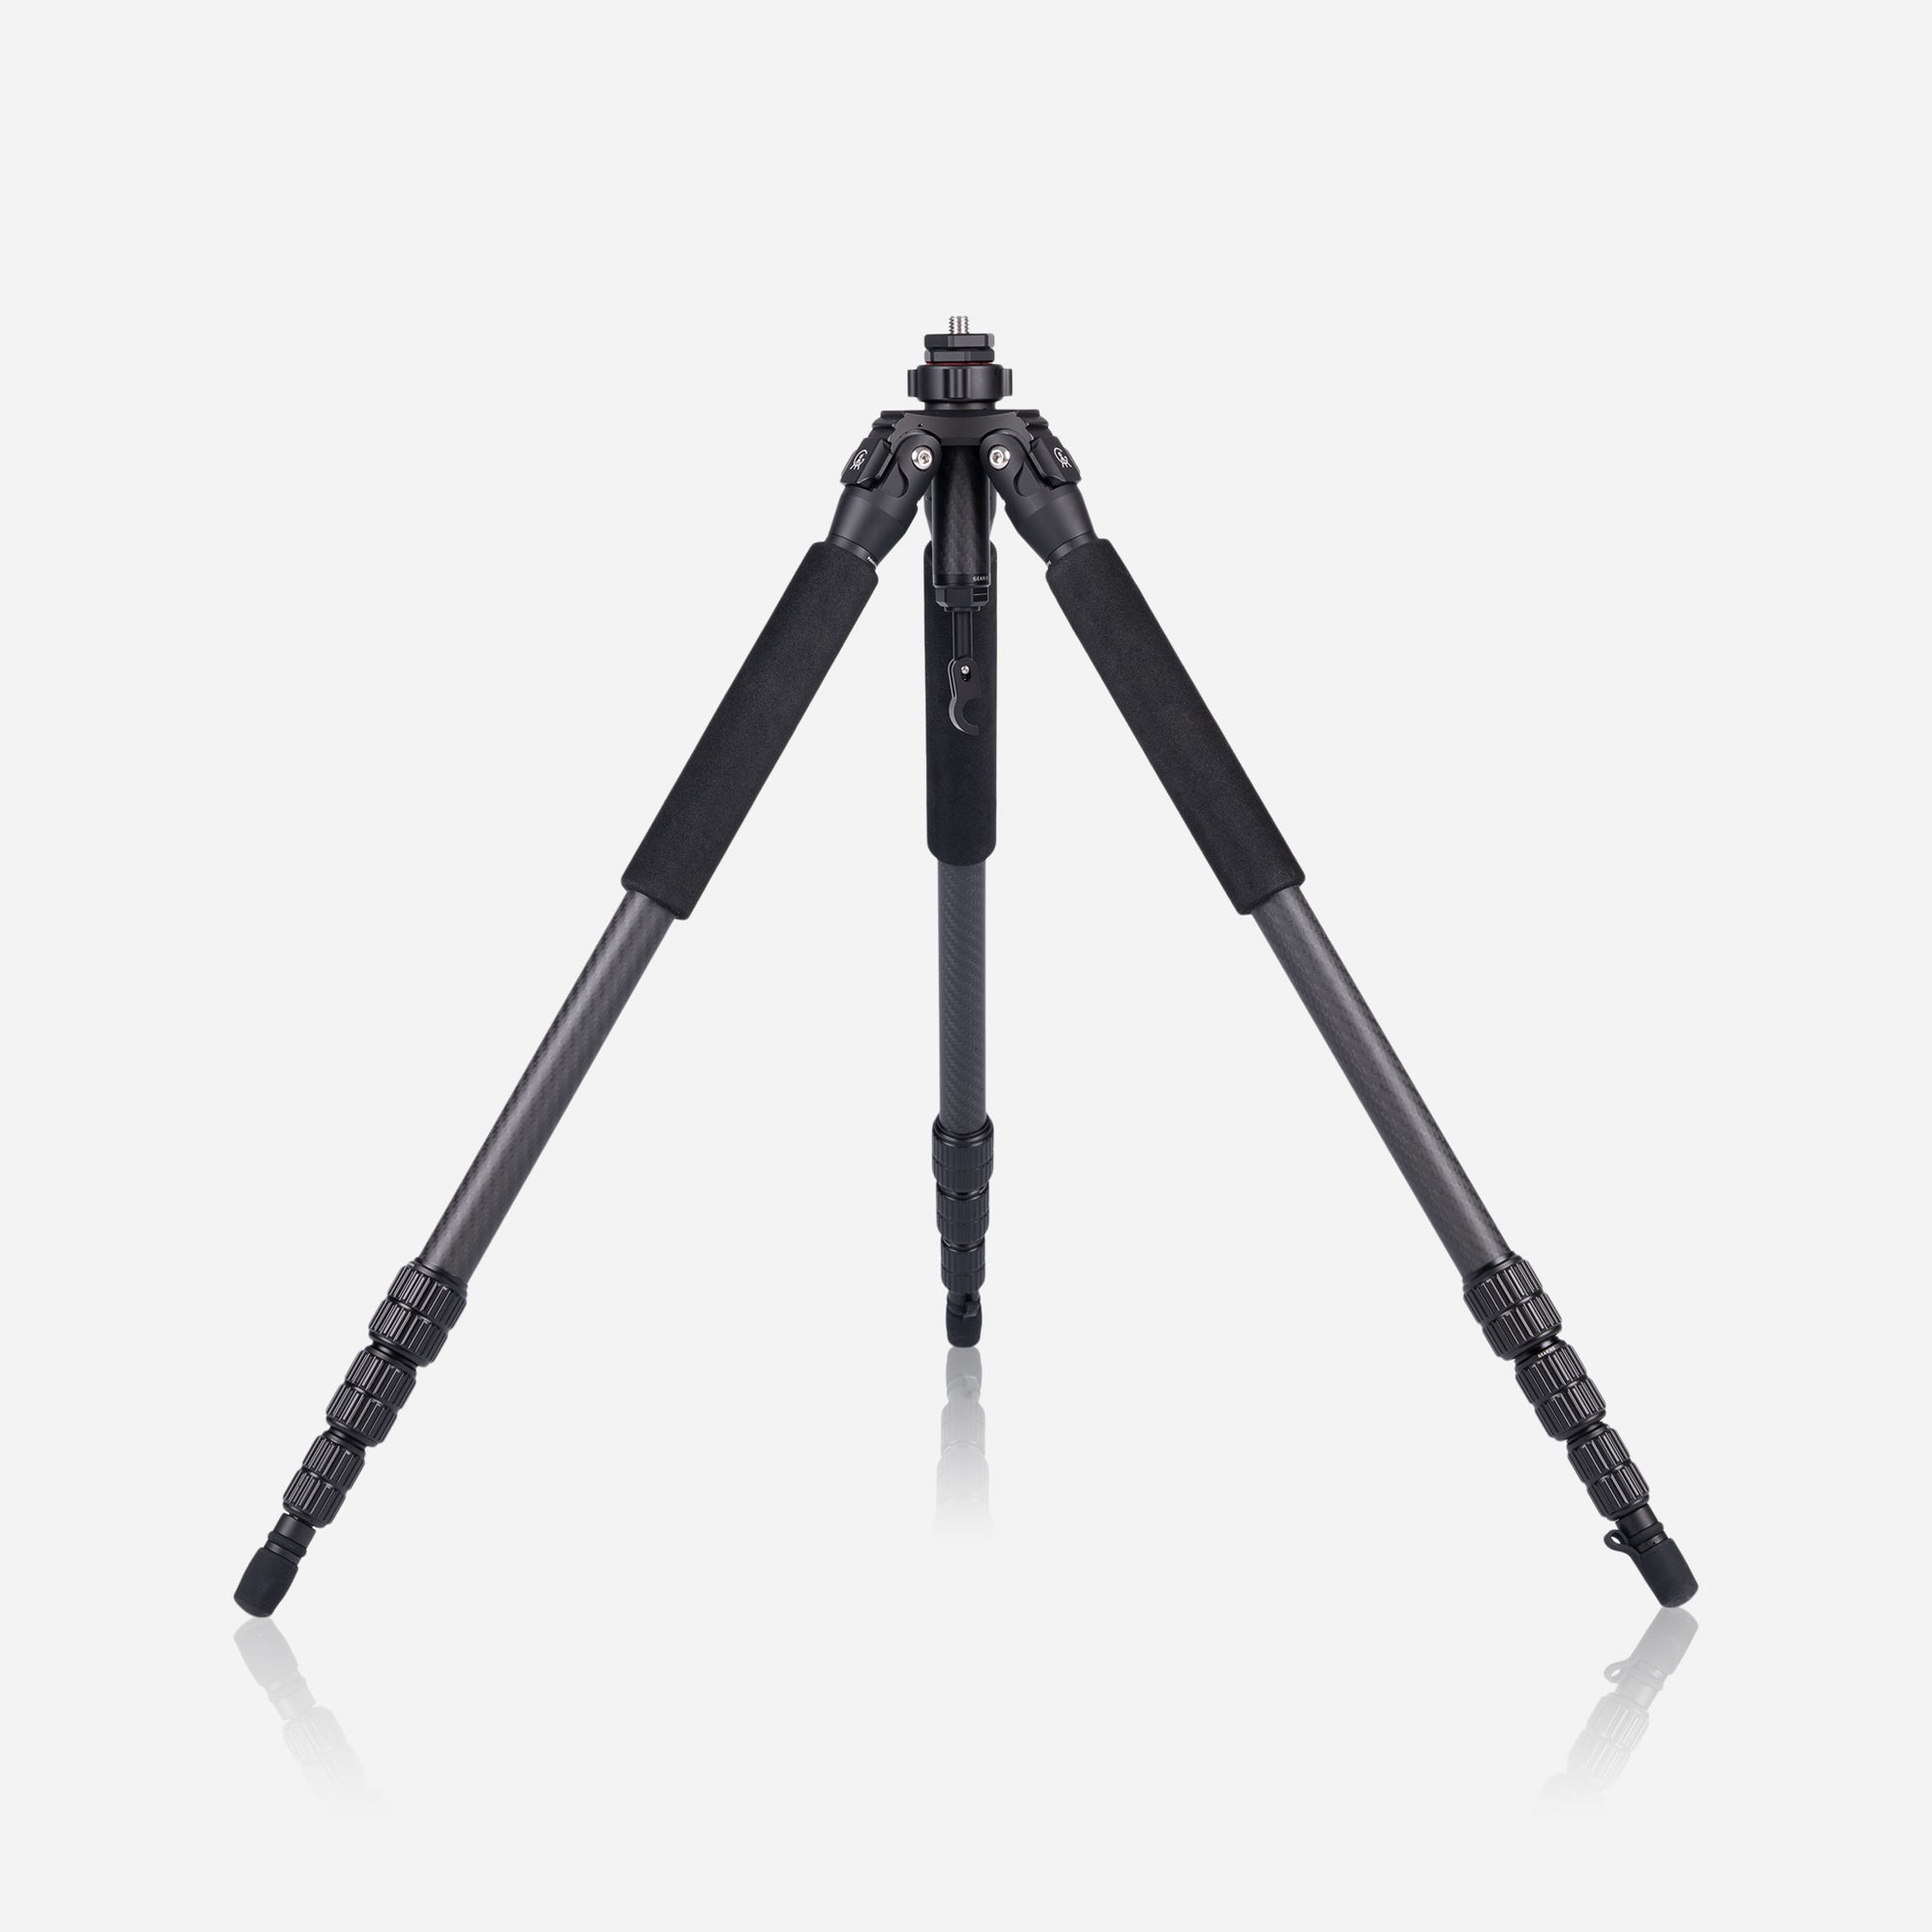
The height can be adjusted via the three rugged twist locks on each leg.
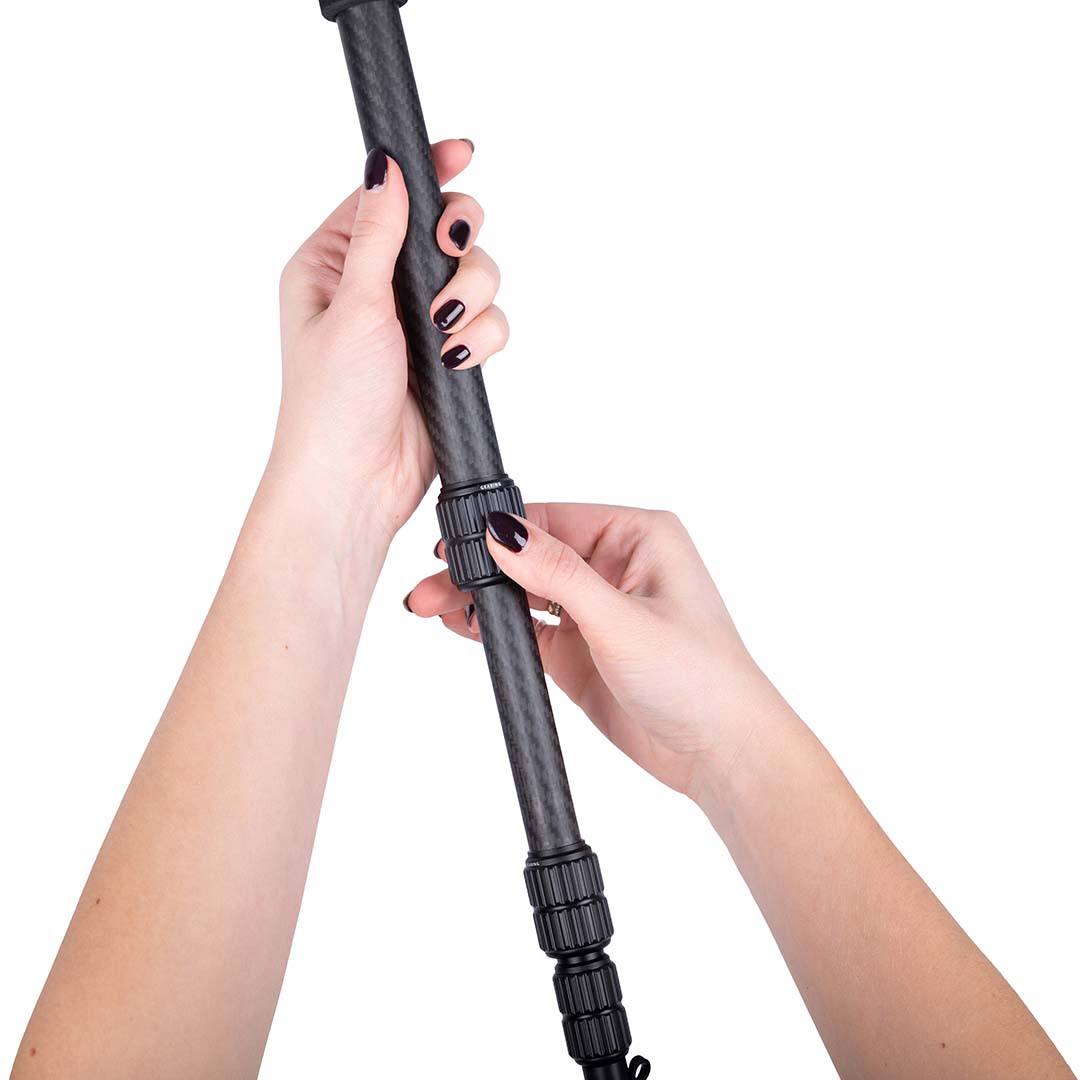
To adjust the leg length simply depress the spring-loaded lever and move the lower leg section to the desired height and release pressure on the latch.
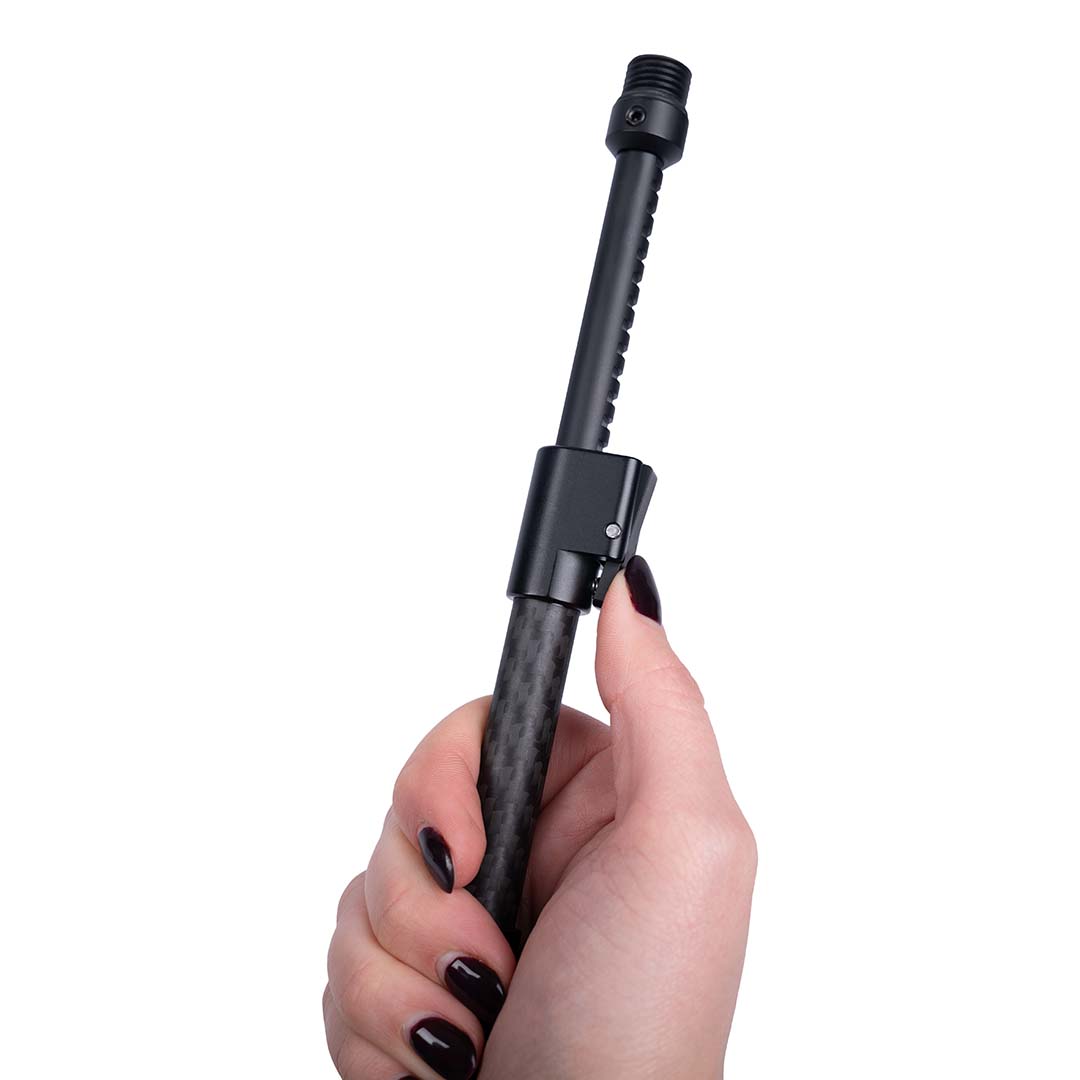
To orientate the lever to suit your personal preference, simply loosen the two grub screws at the top of the leg & rotate the leg section to the desired position.
Proceed to retighten the grub screws while being careful not to over-tighten.
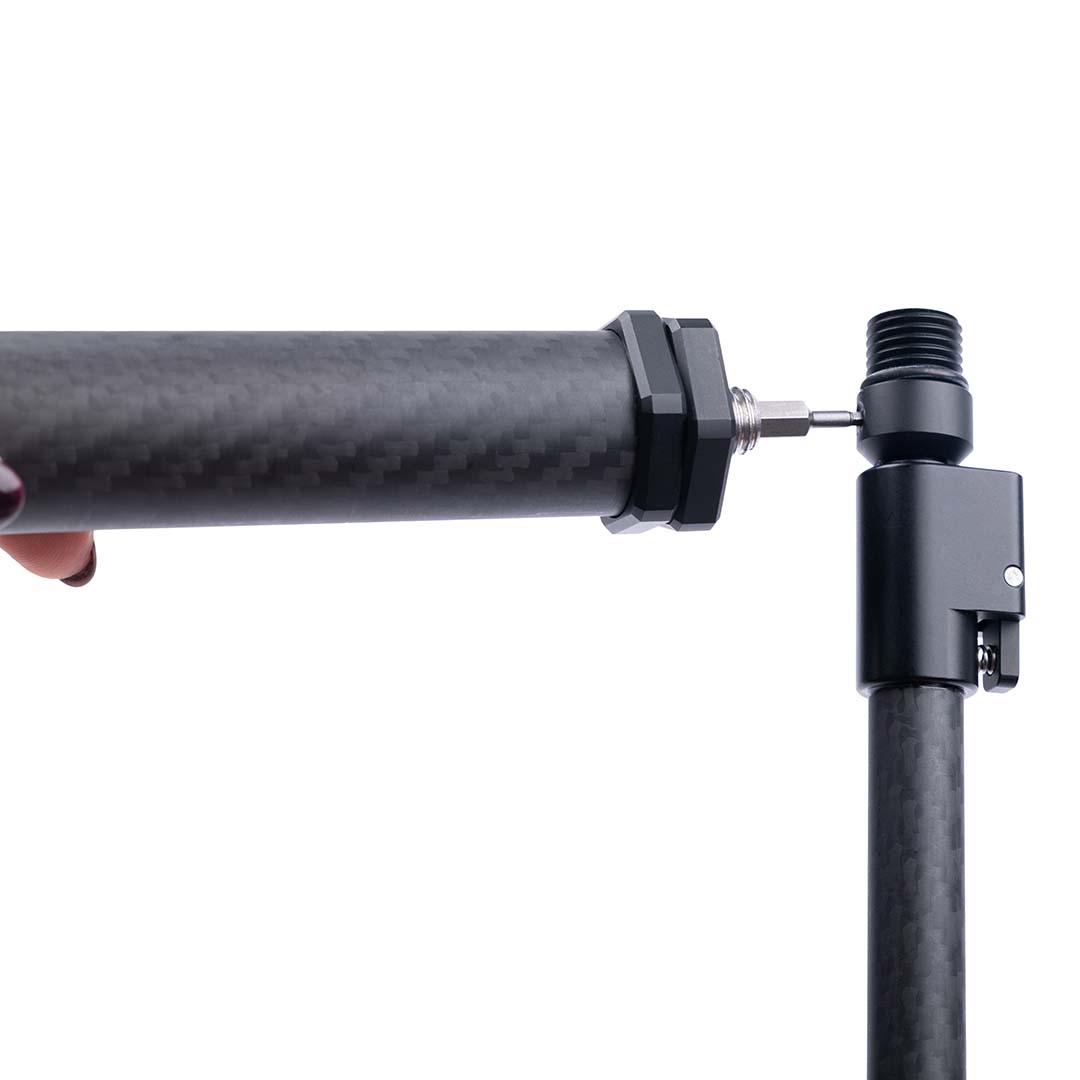
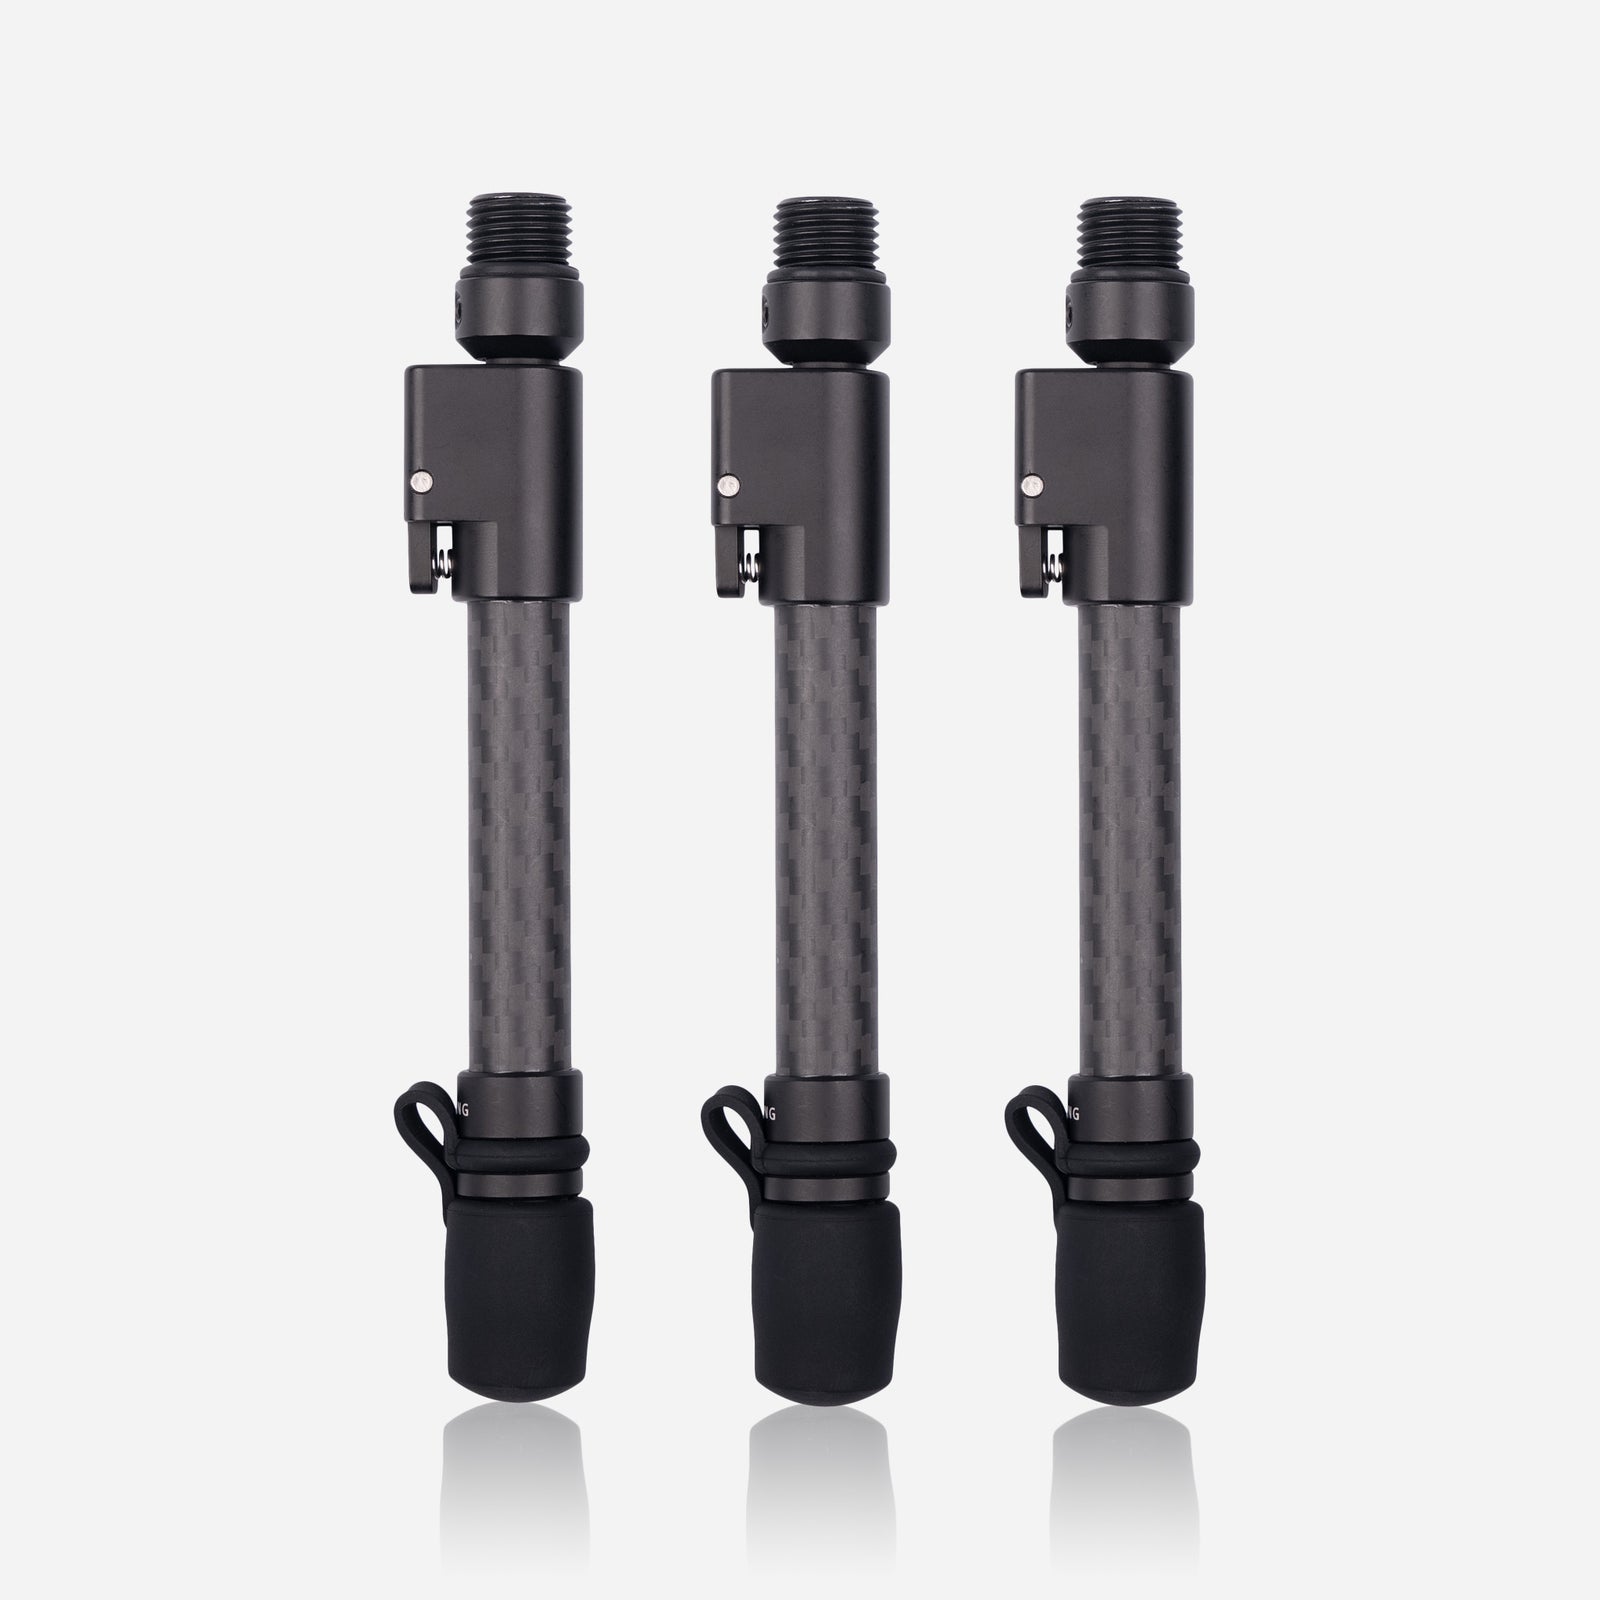
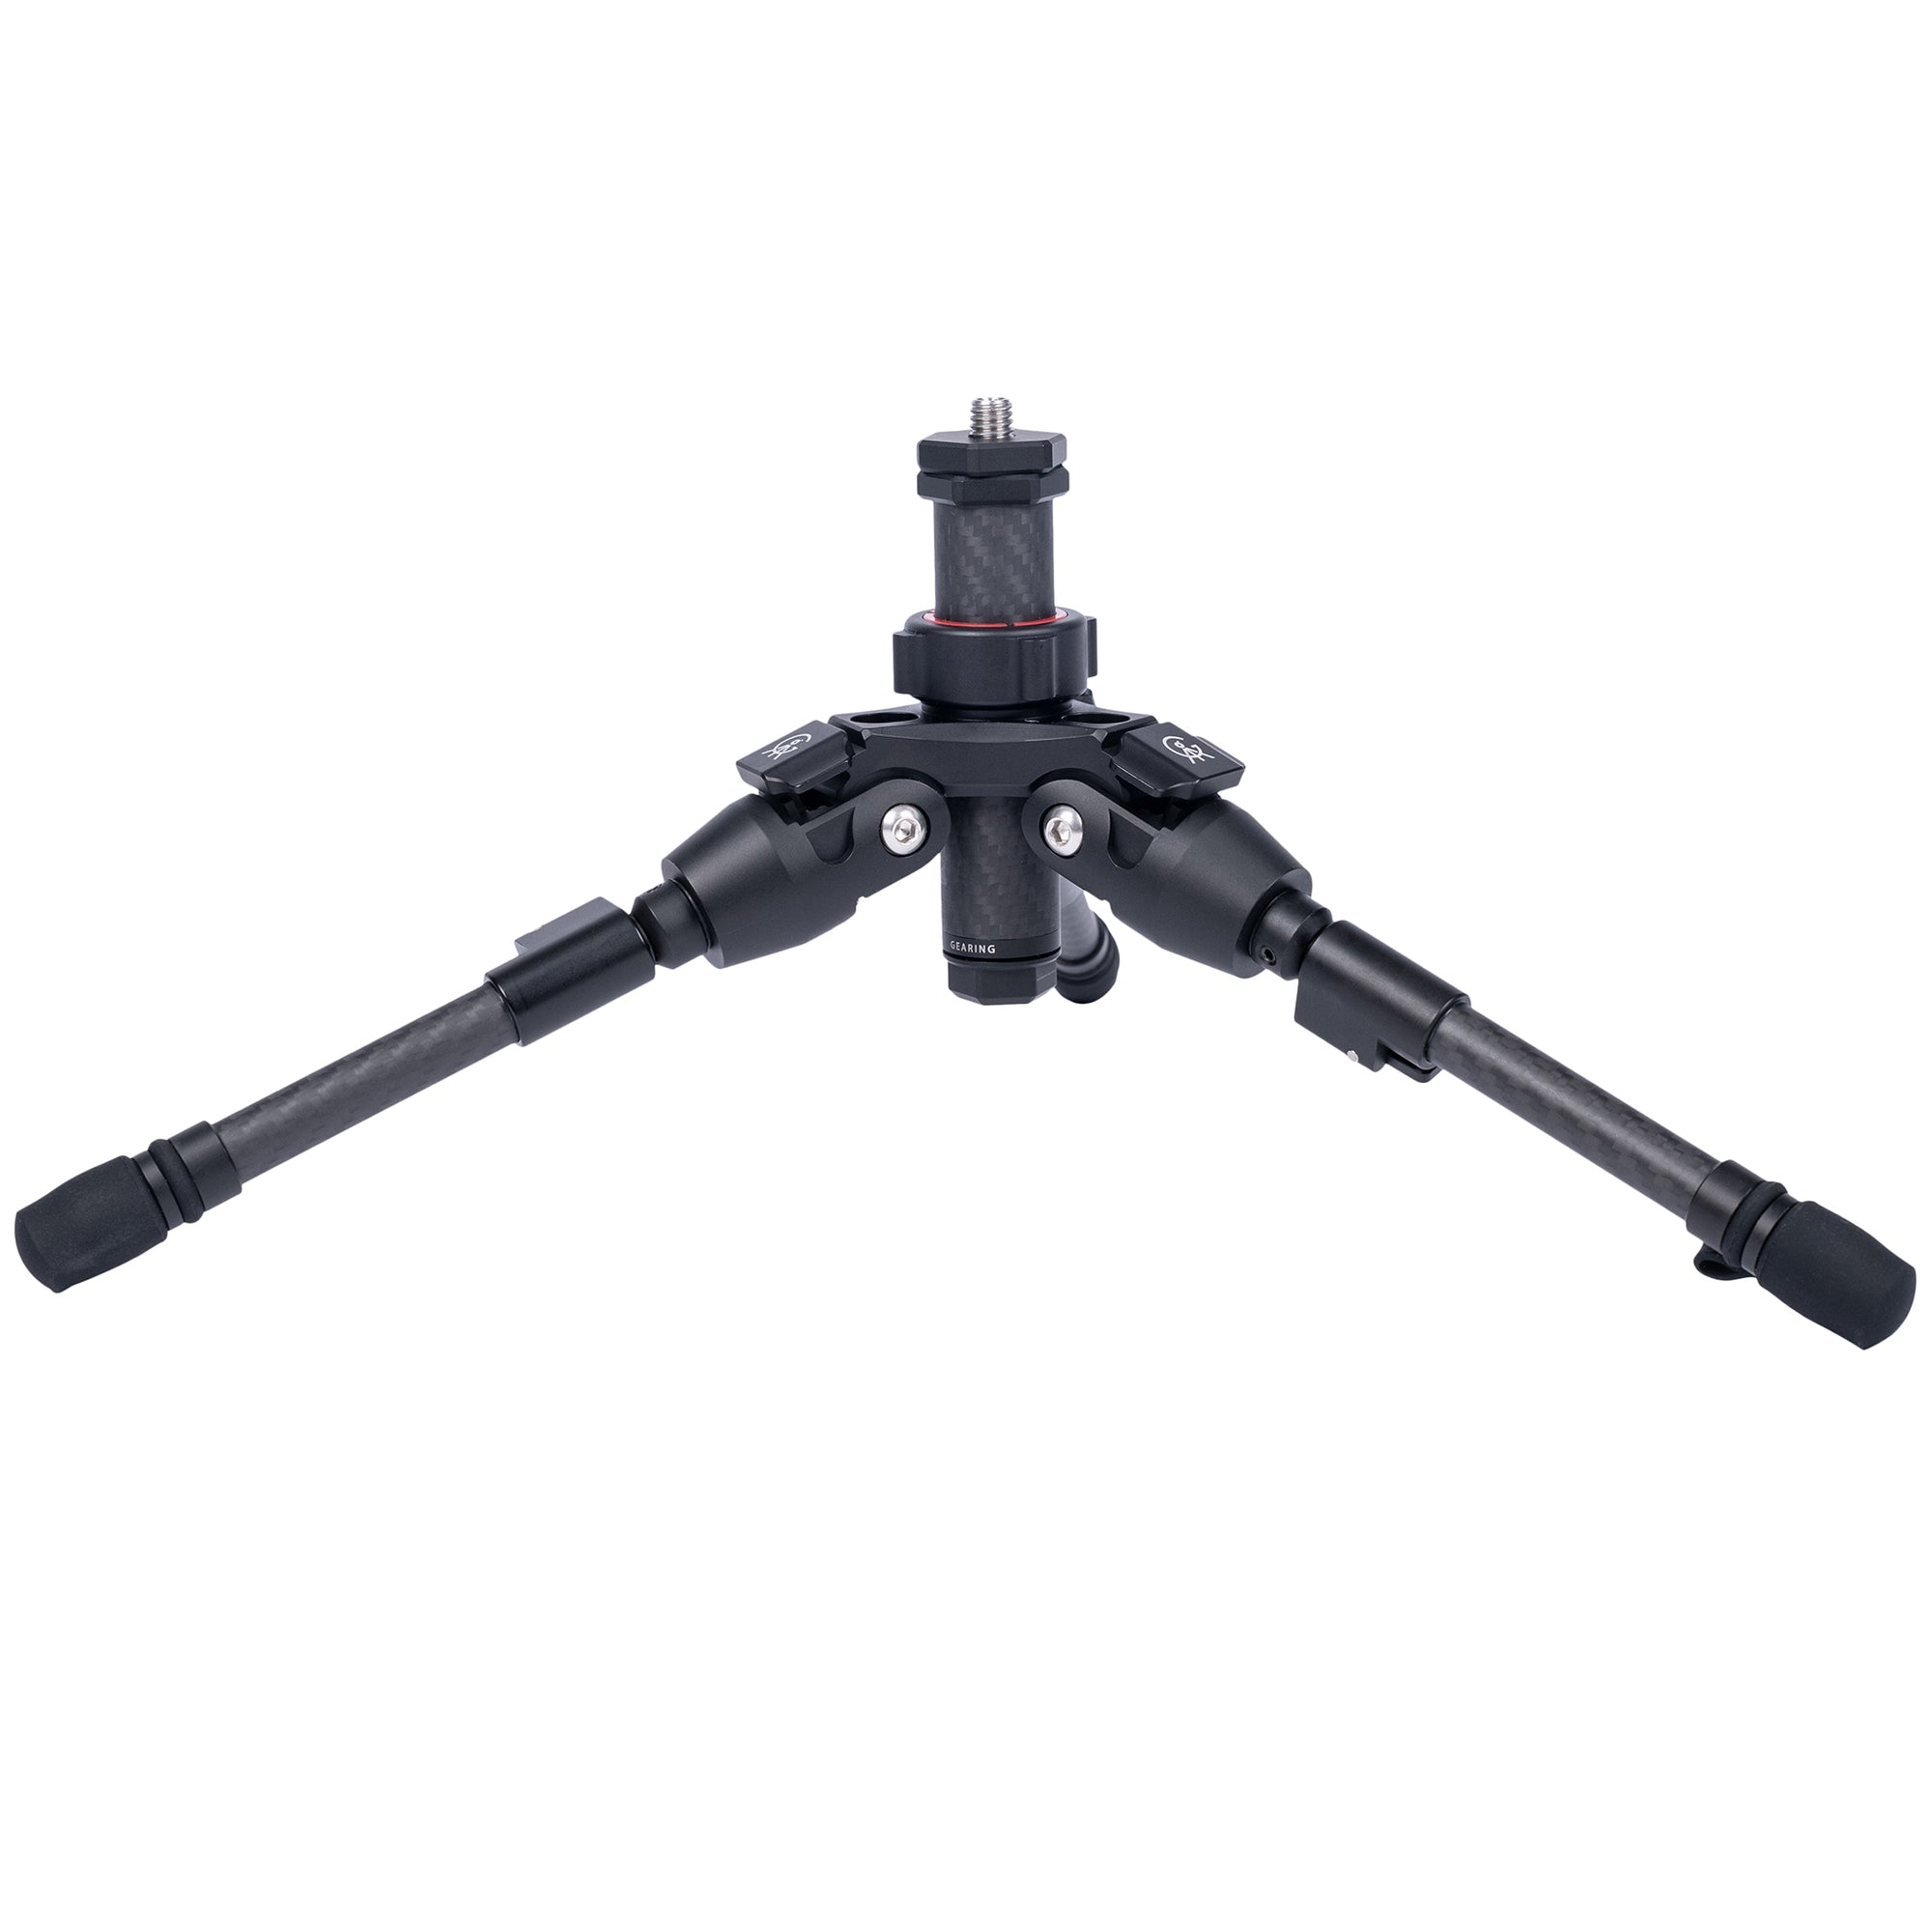
The Heart Unit features four-leg pitch positions. Simply pull the latch out and set the leg to the desired pitch position.
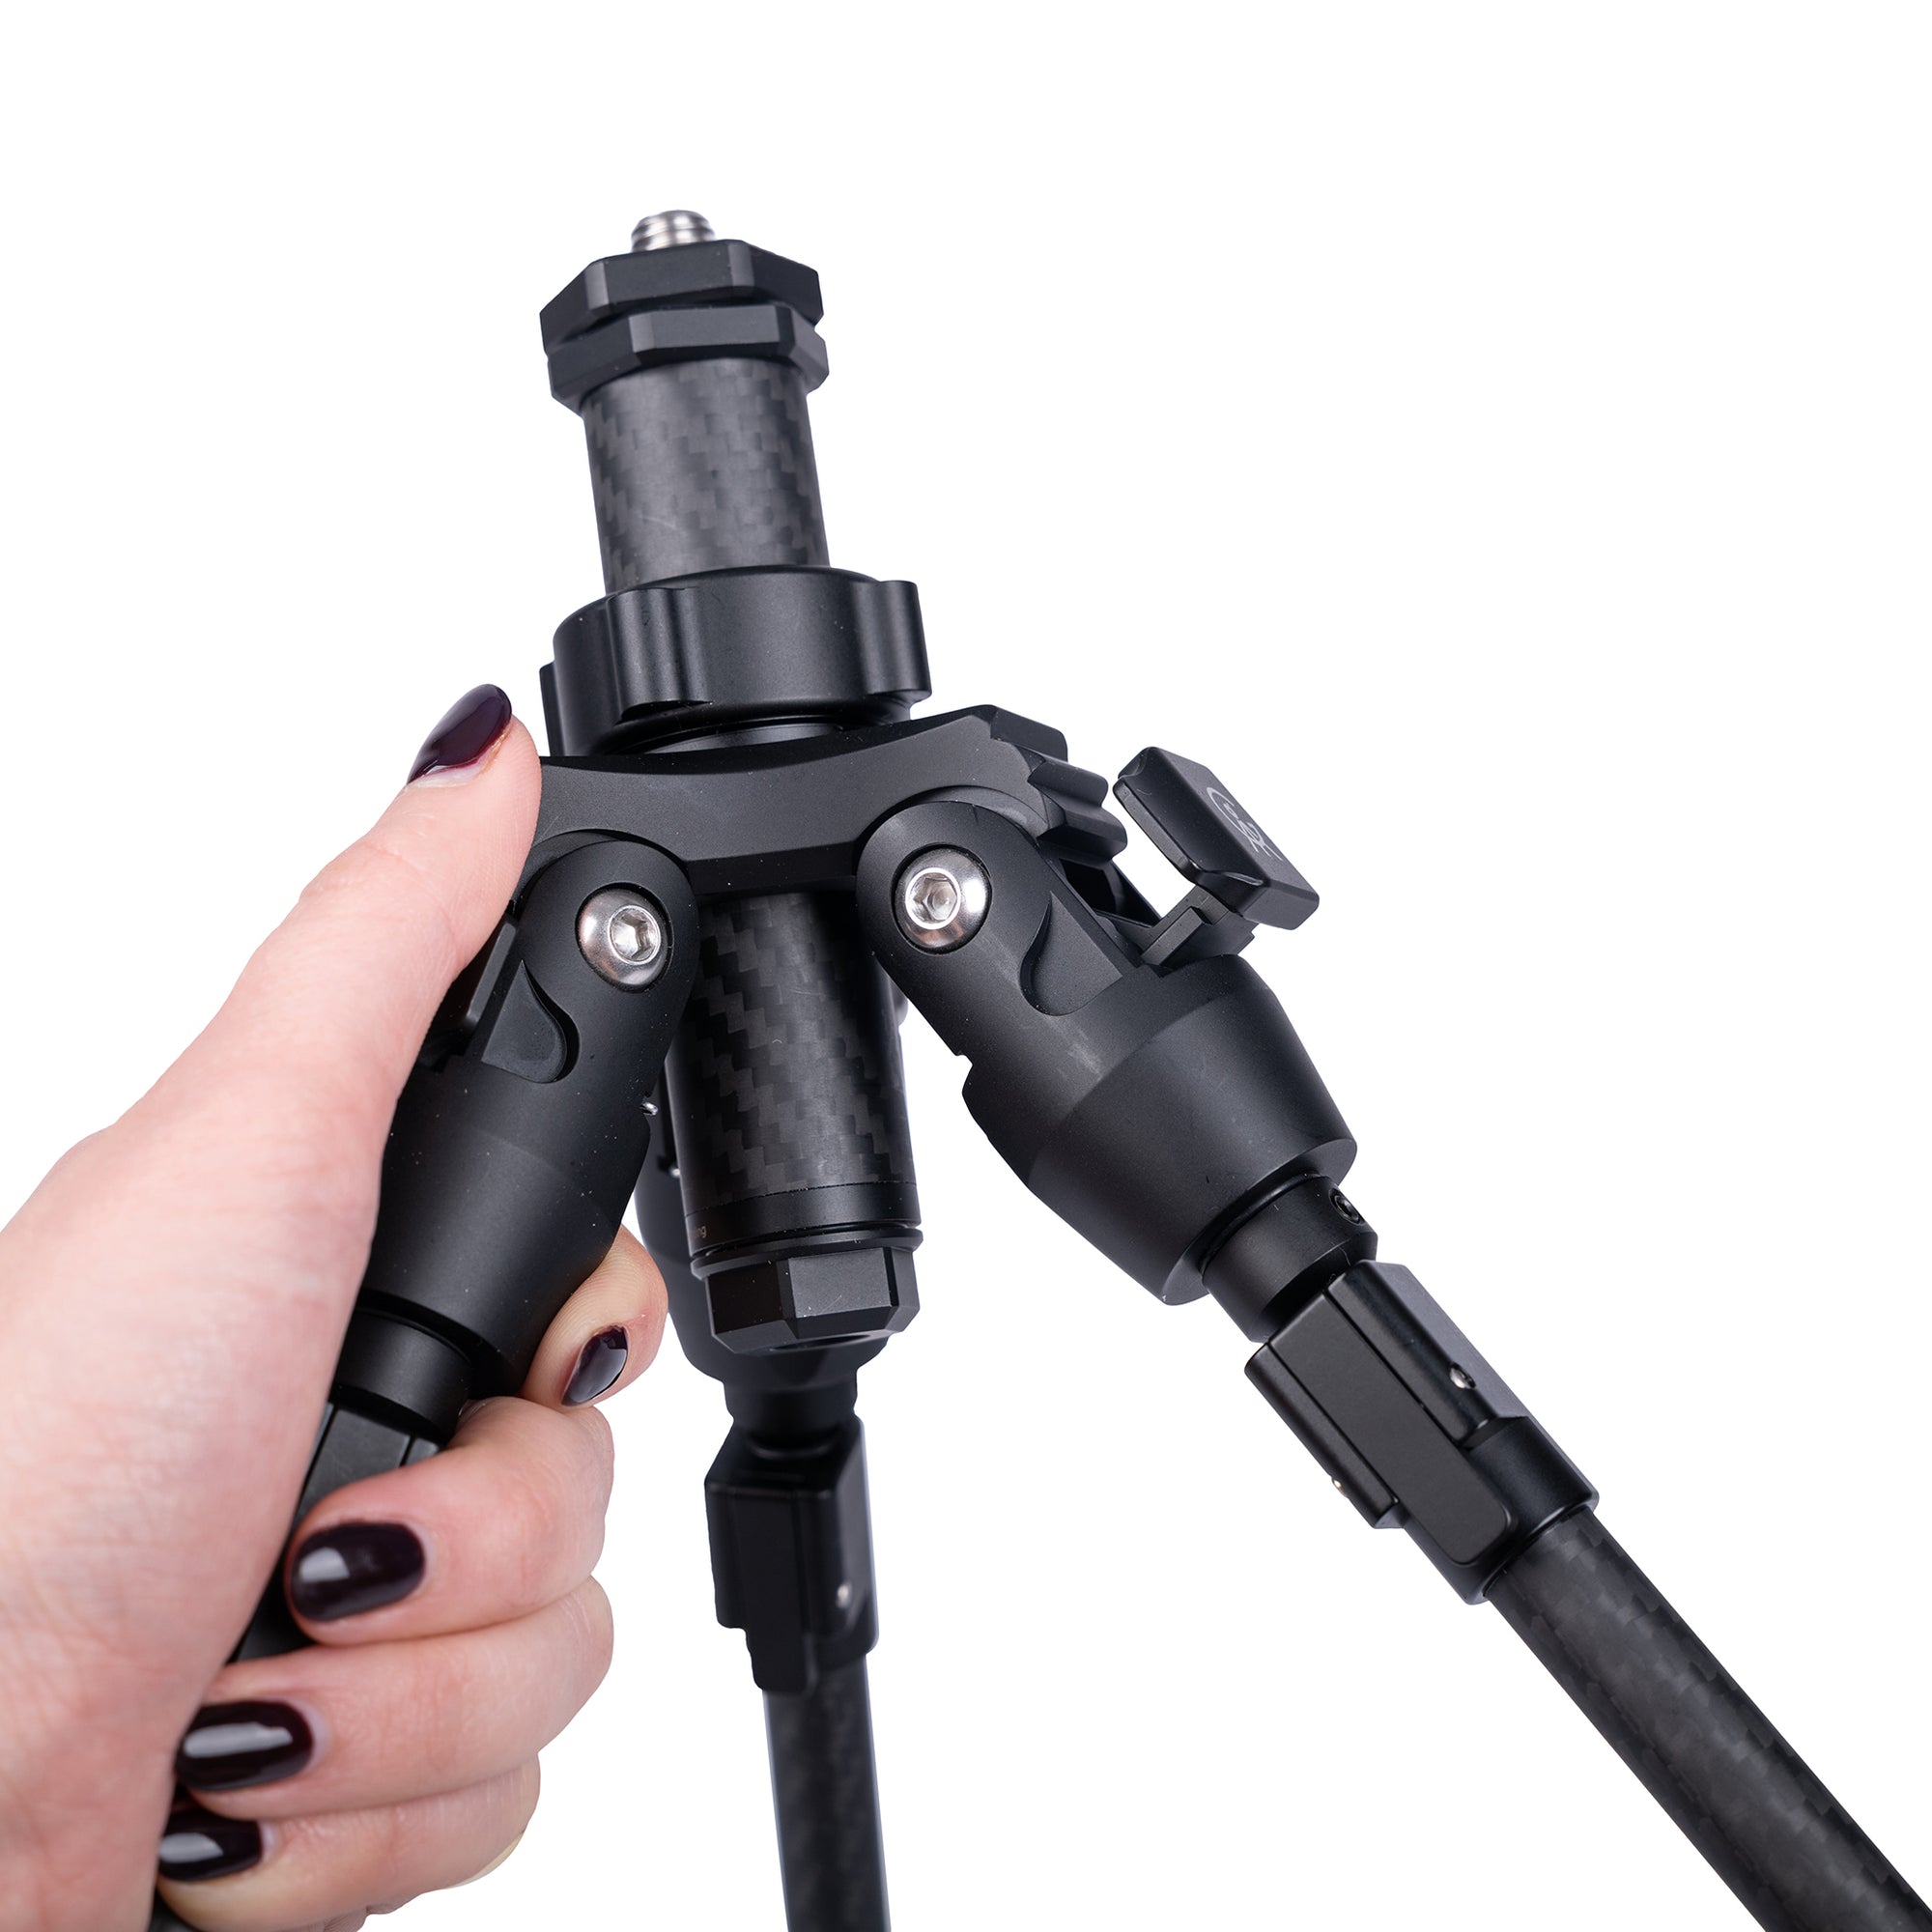
For low mode, extend to the 4th pitch position.
Invert the Centre Column to shoot straight down and capture unique angles.
There are two monopod configurations that are attainable:
1. Mount the Light-Duty Adapter on top of the leg and close the clasp to make sure it is securely resting on top of the leg. Then mount the camera directly on top of the Light-Duty Adapter via the ¼” thread.
2. Alternatively, you may wish to configure the monopod using a Ball Head. To do this, screw the Monopod Converter onto the top of the leg. The ⅜” thread of the Monopod Converter then screws directly into the bottom of the ball head.
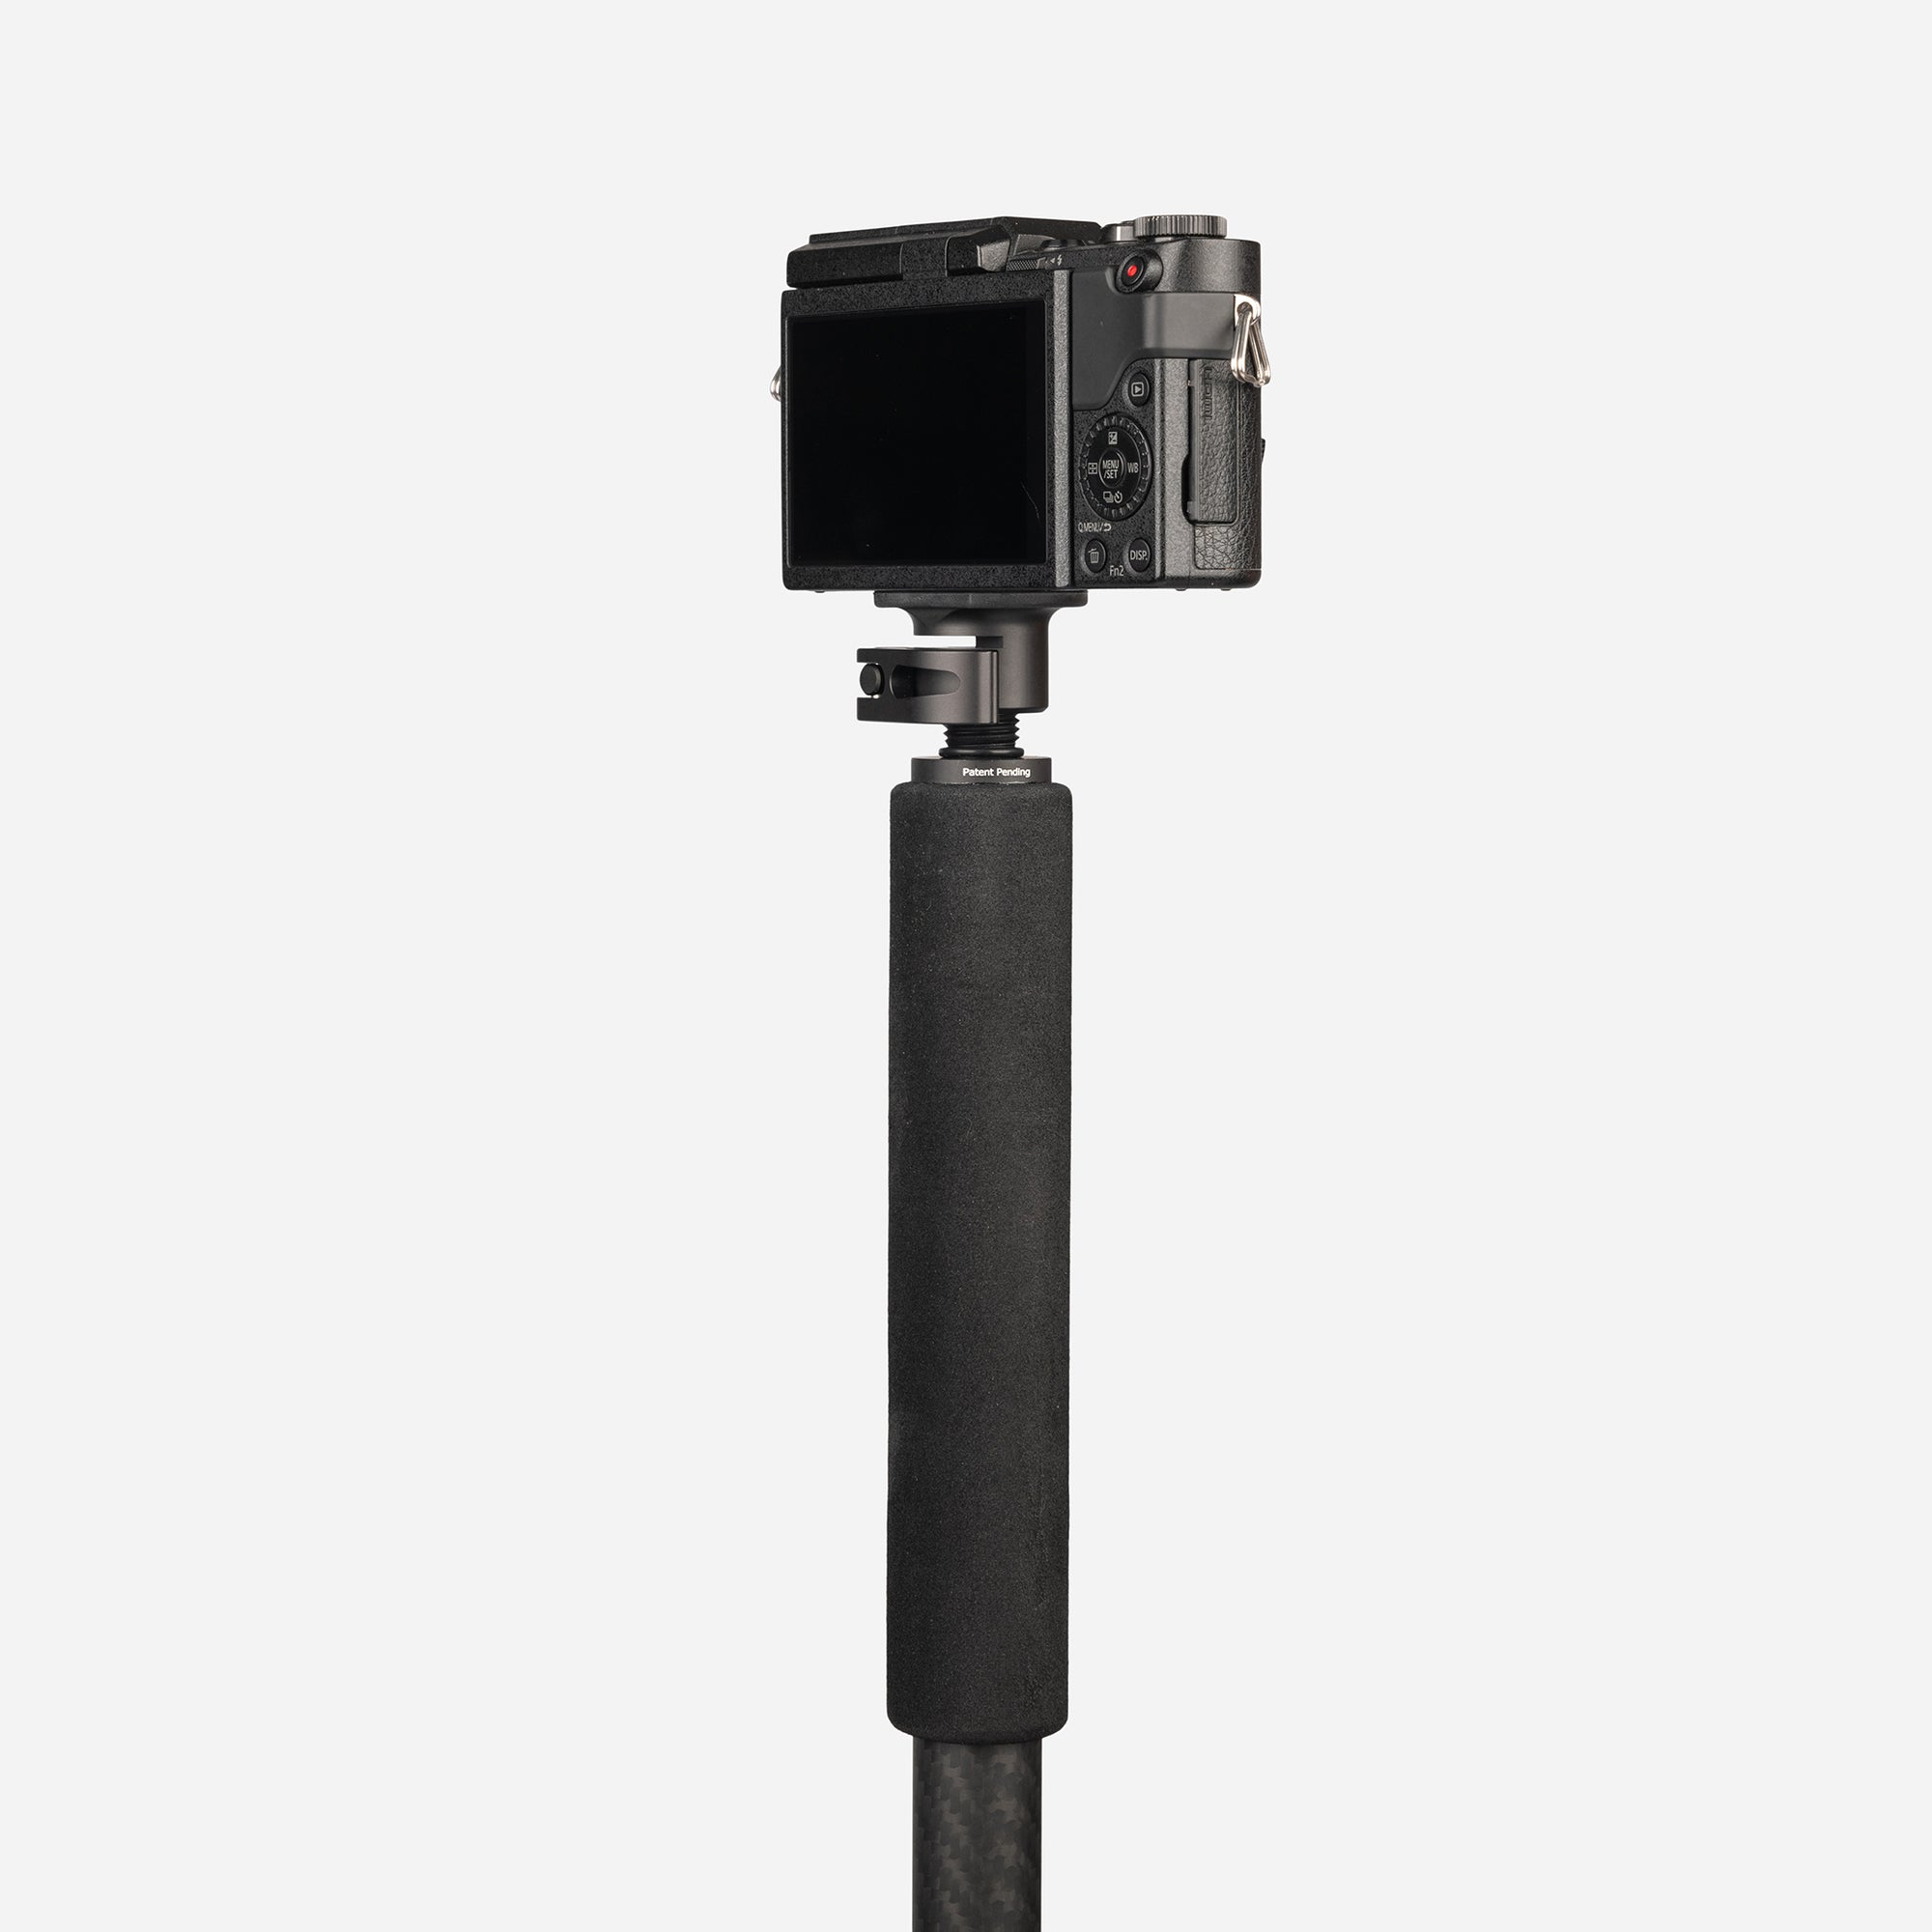
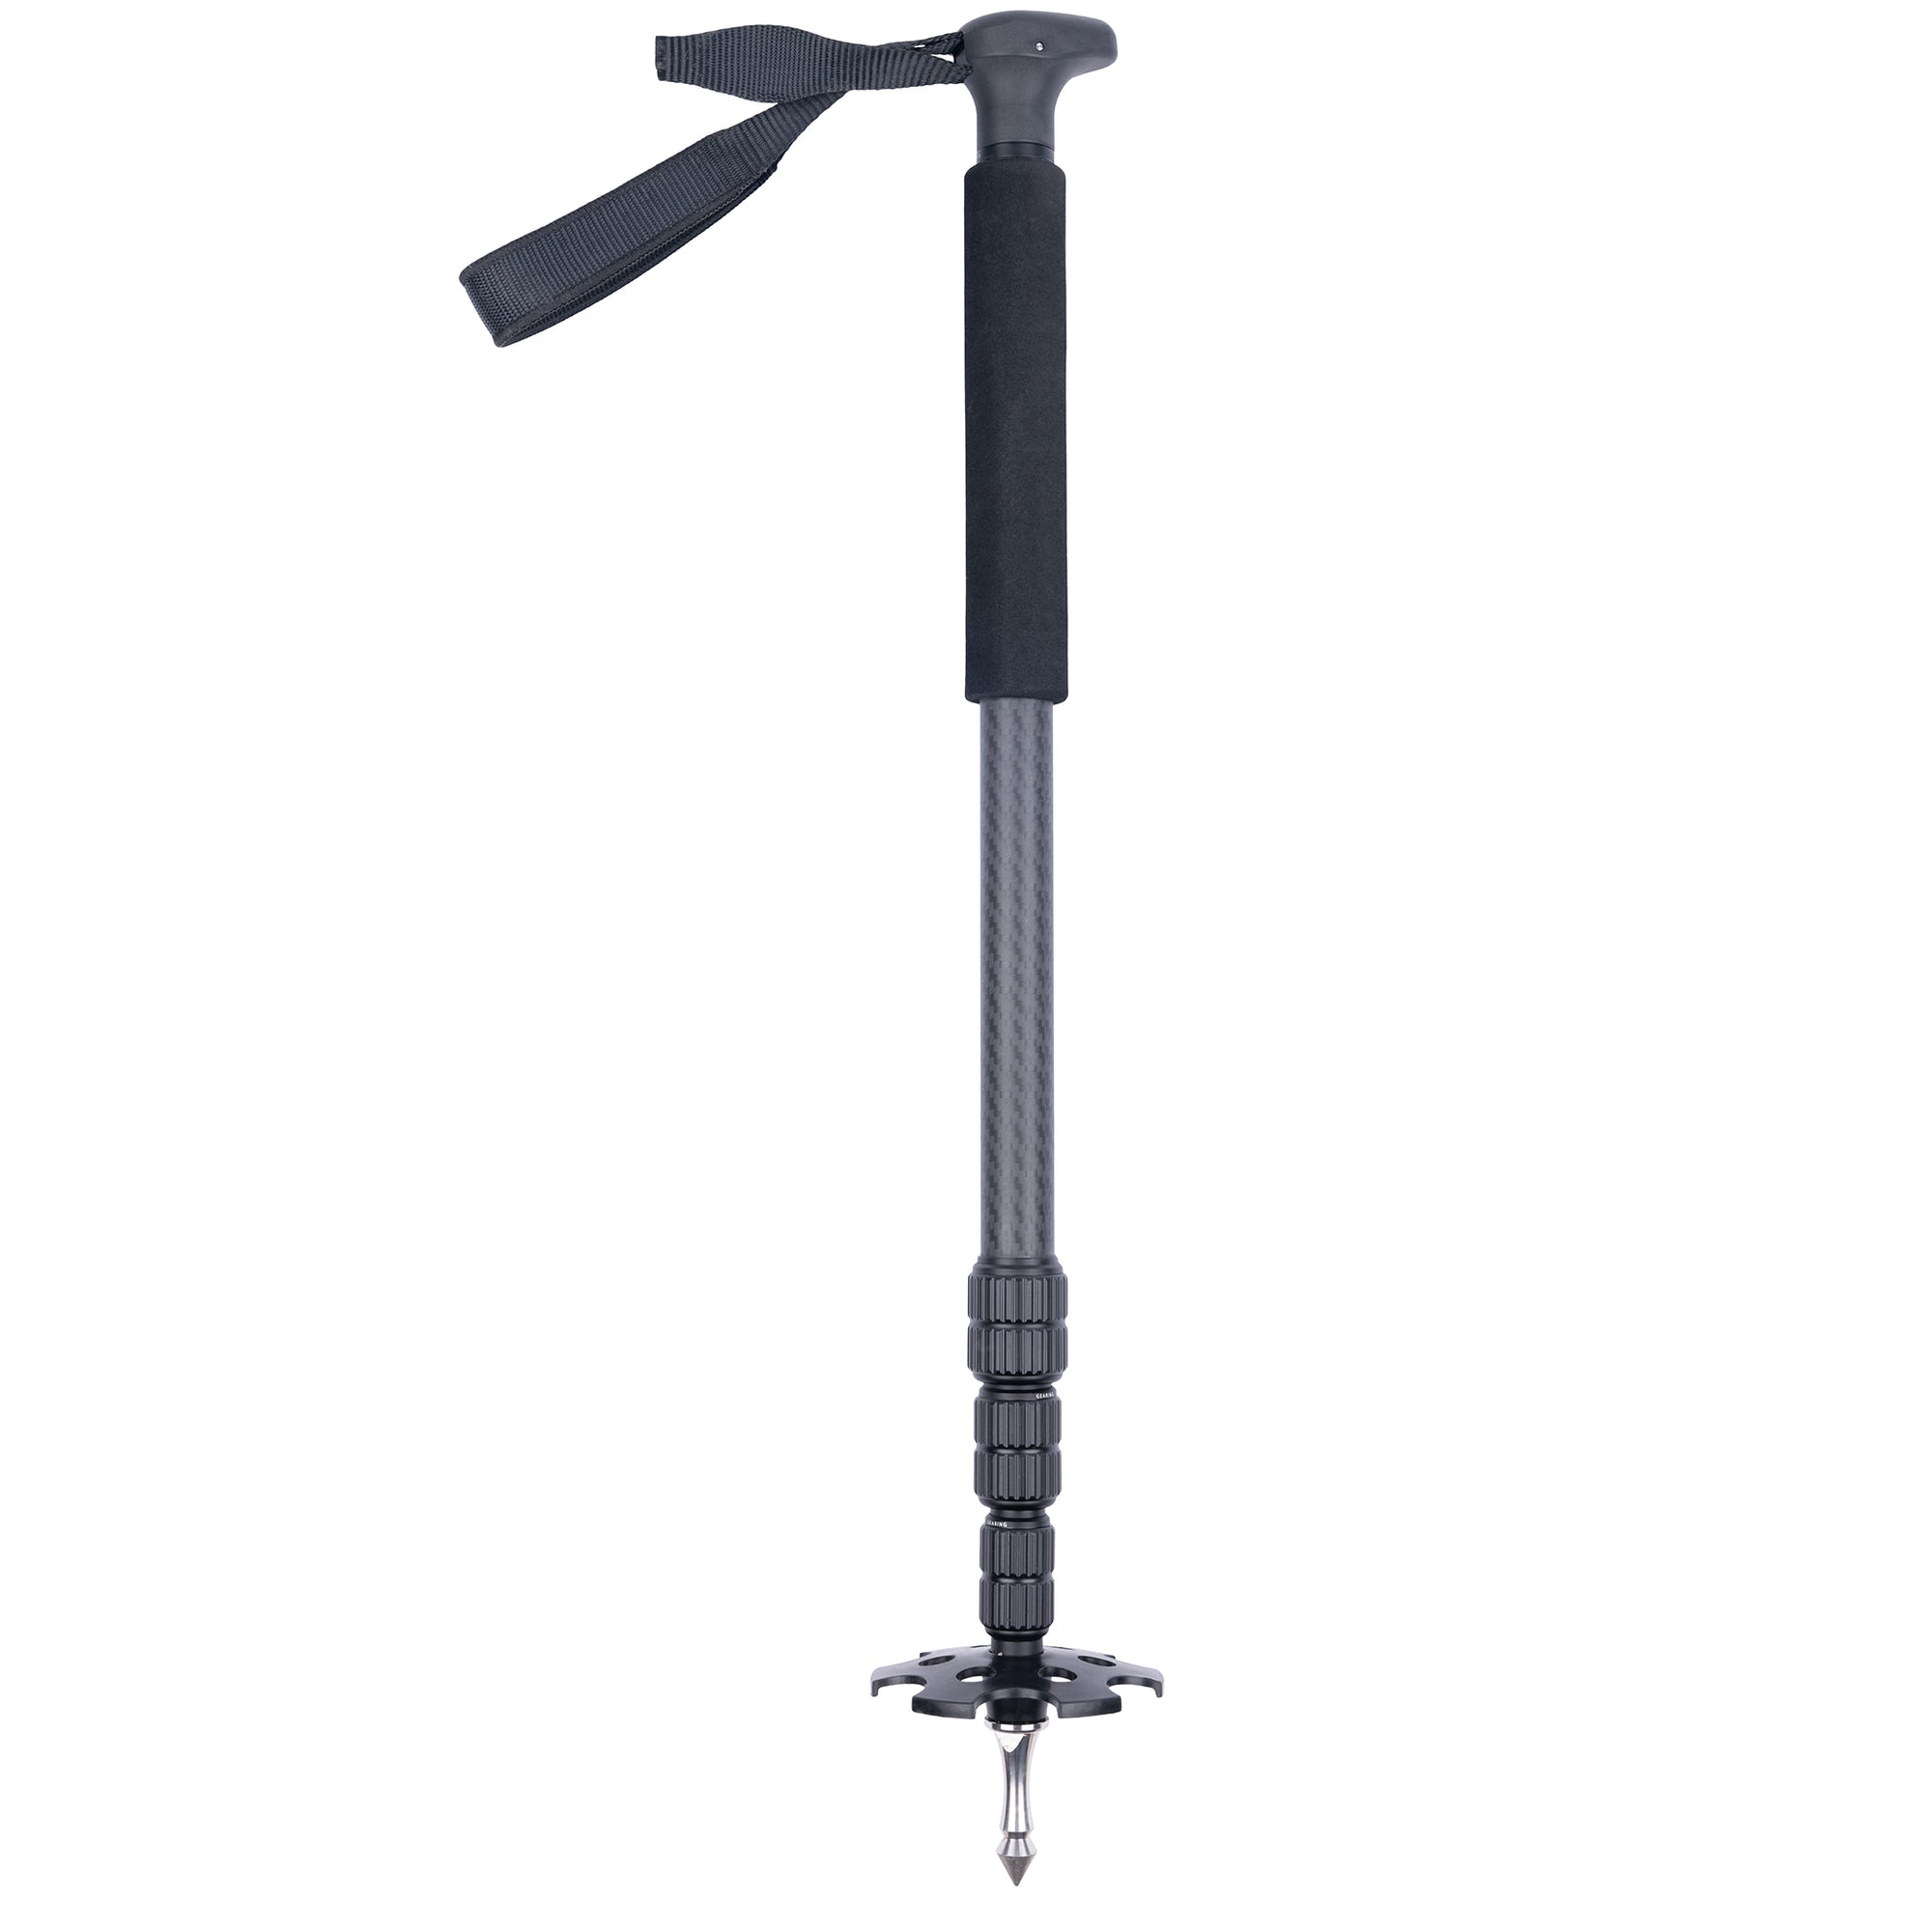
Can be configured for handheld videography or as a selfie stick.
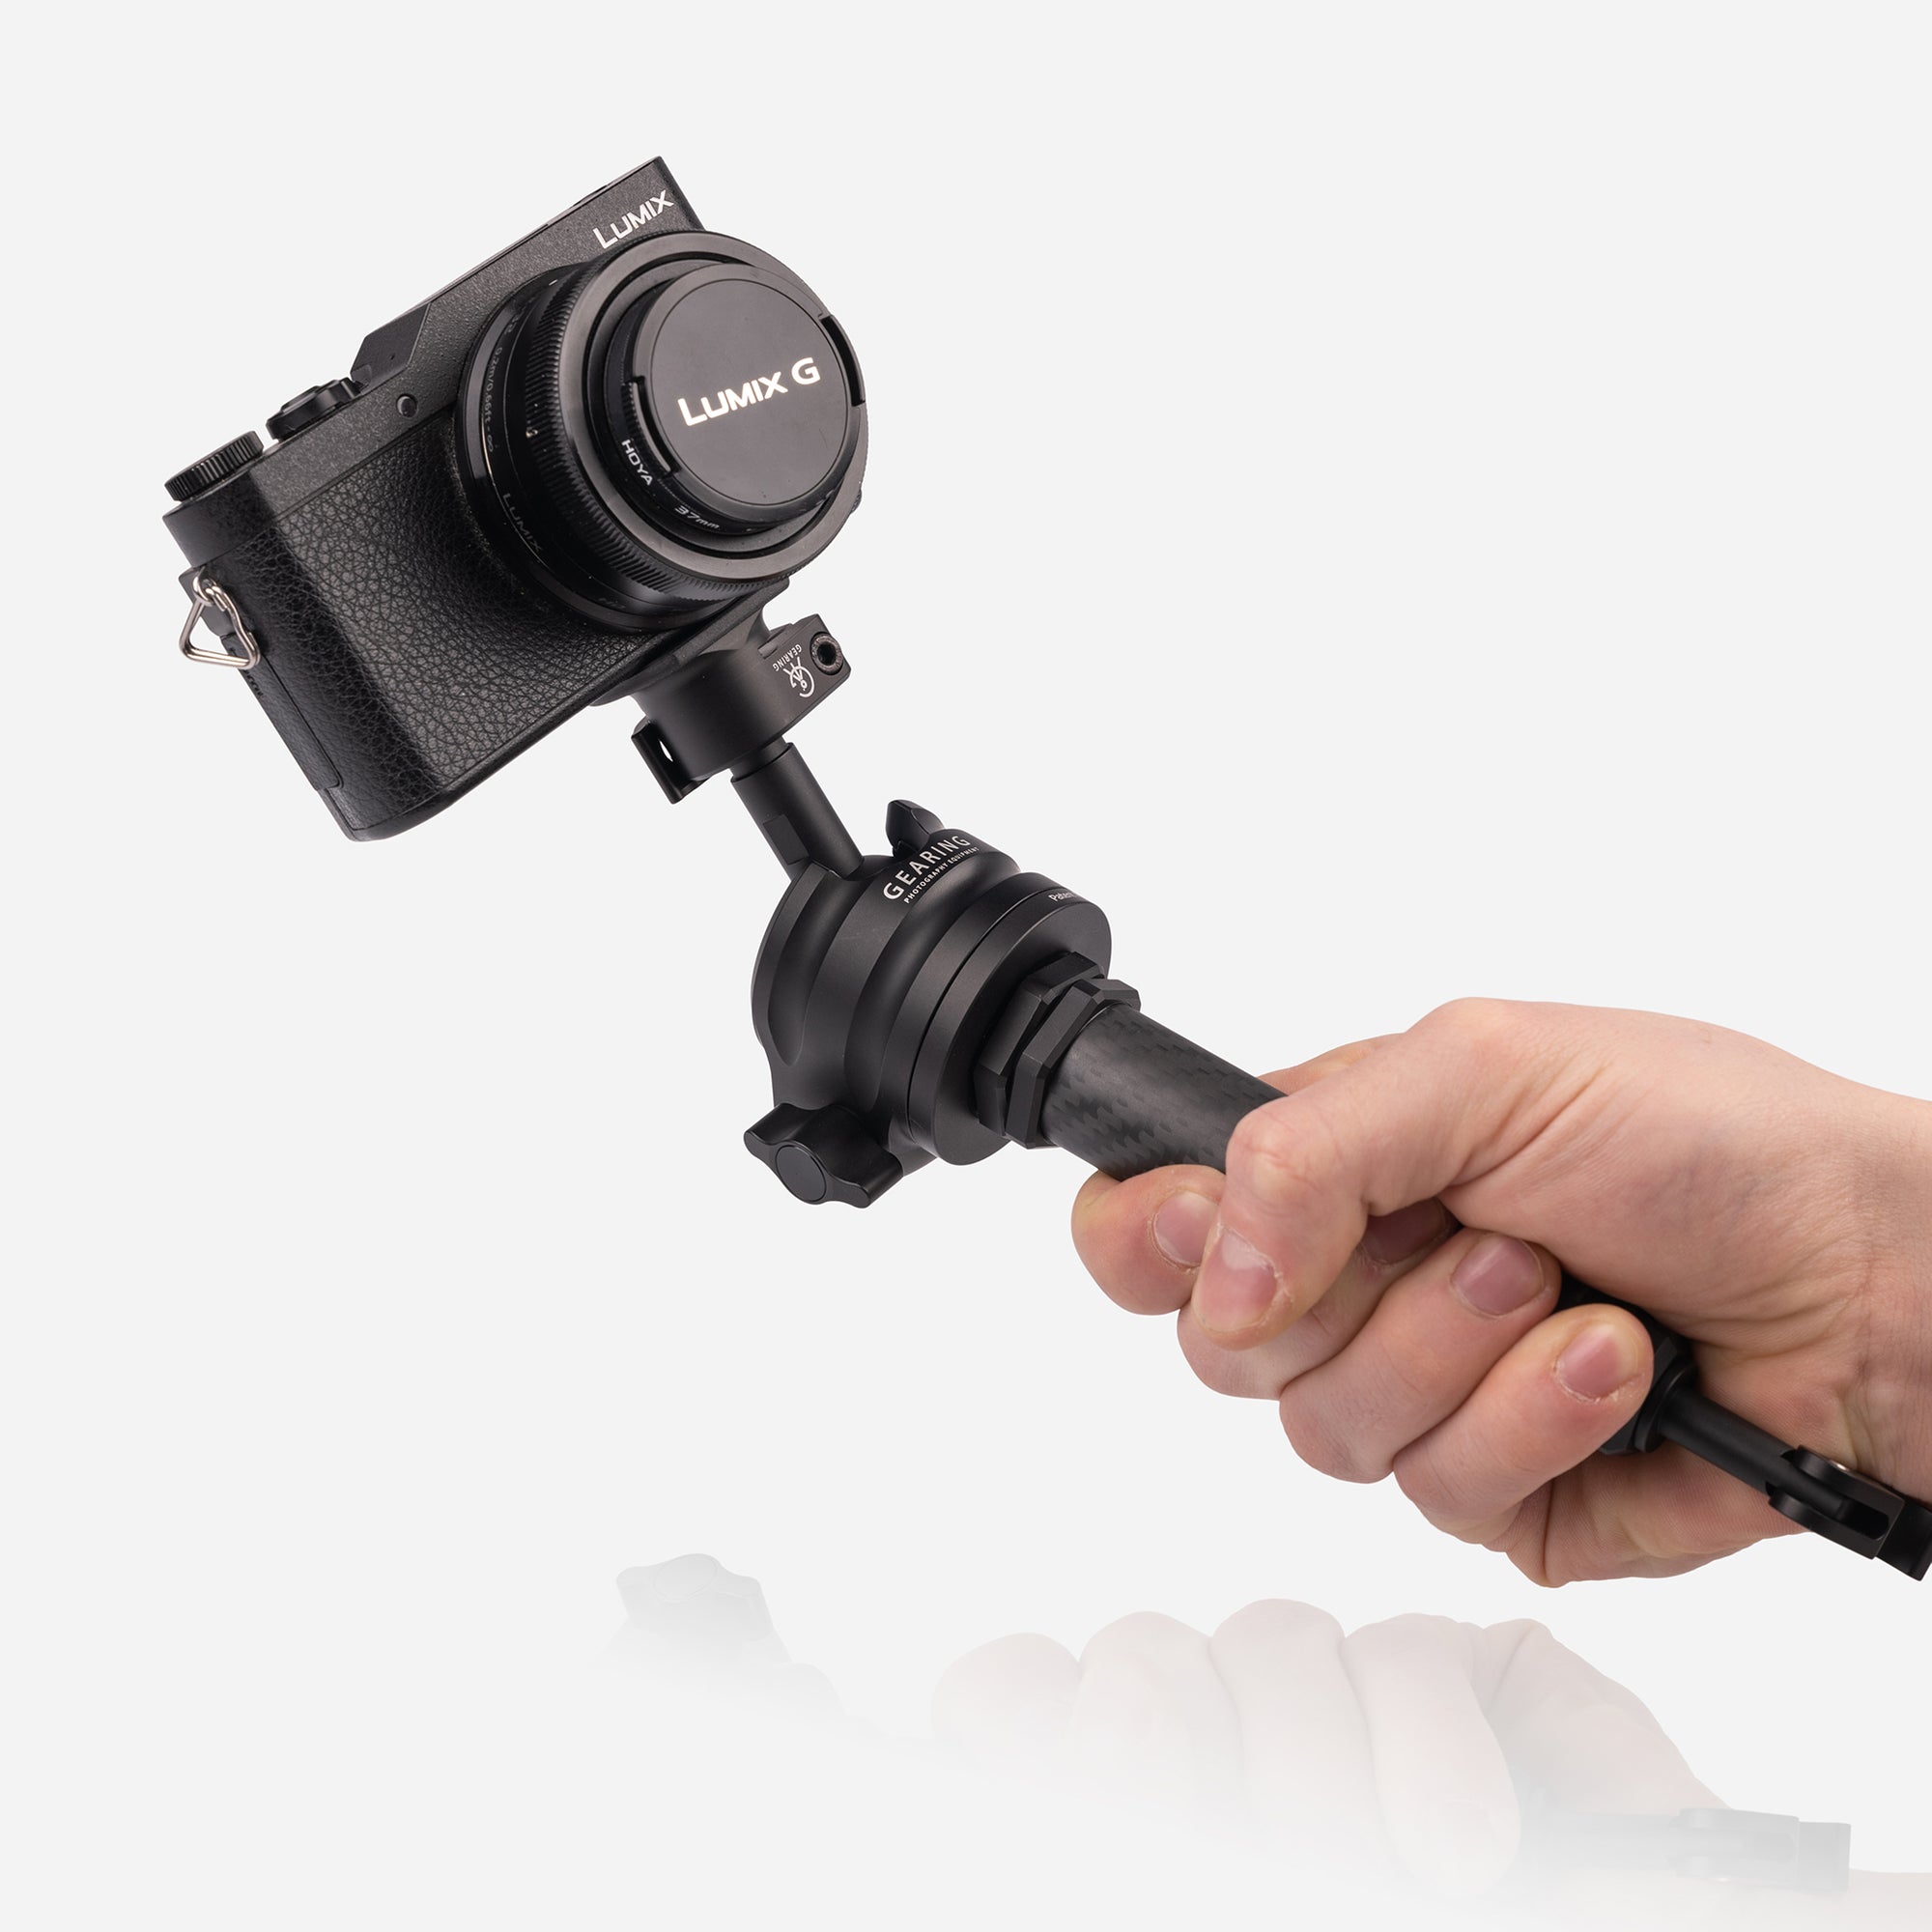
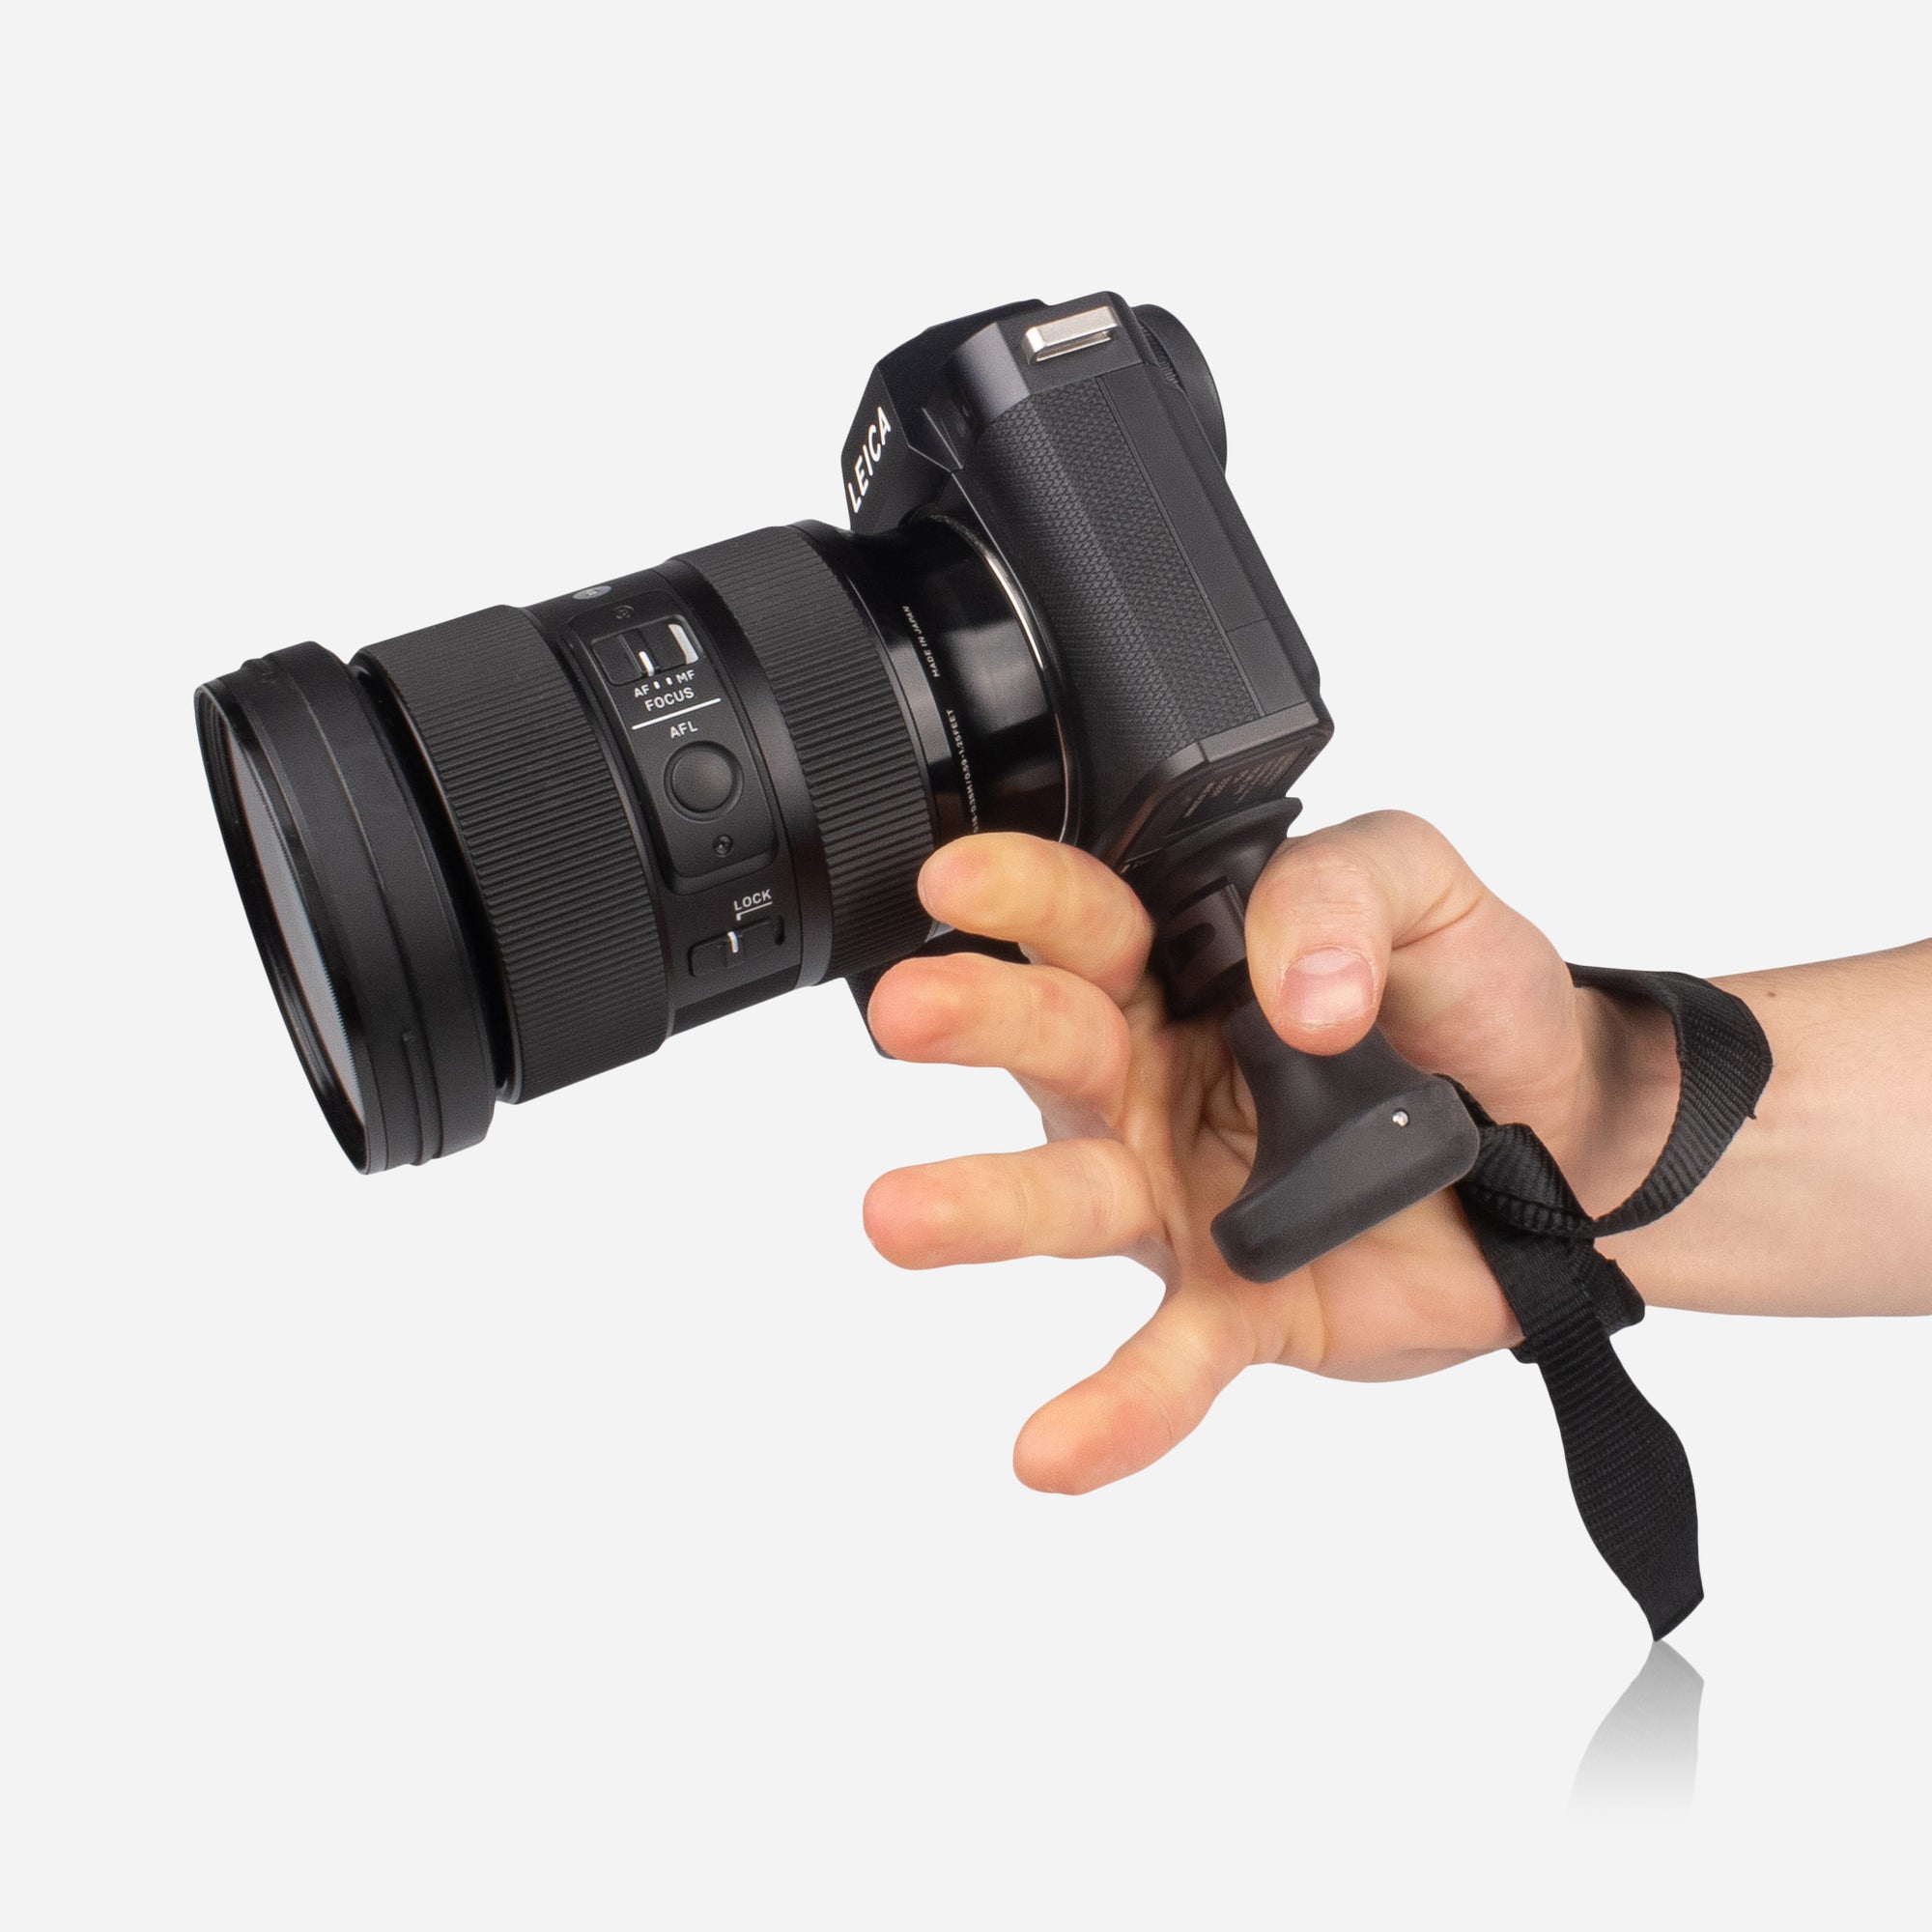
Convert your trekking handle into a wrist strap for carrying your camera for those quick shots.
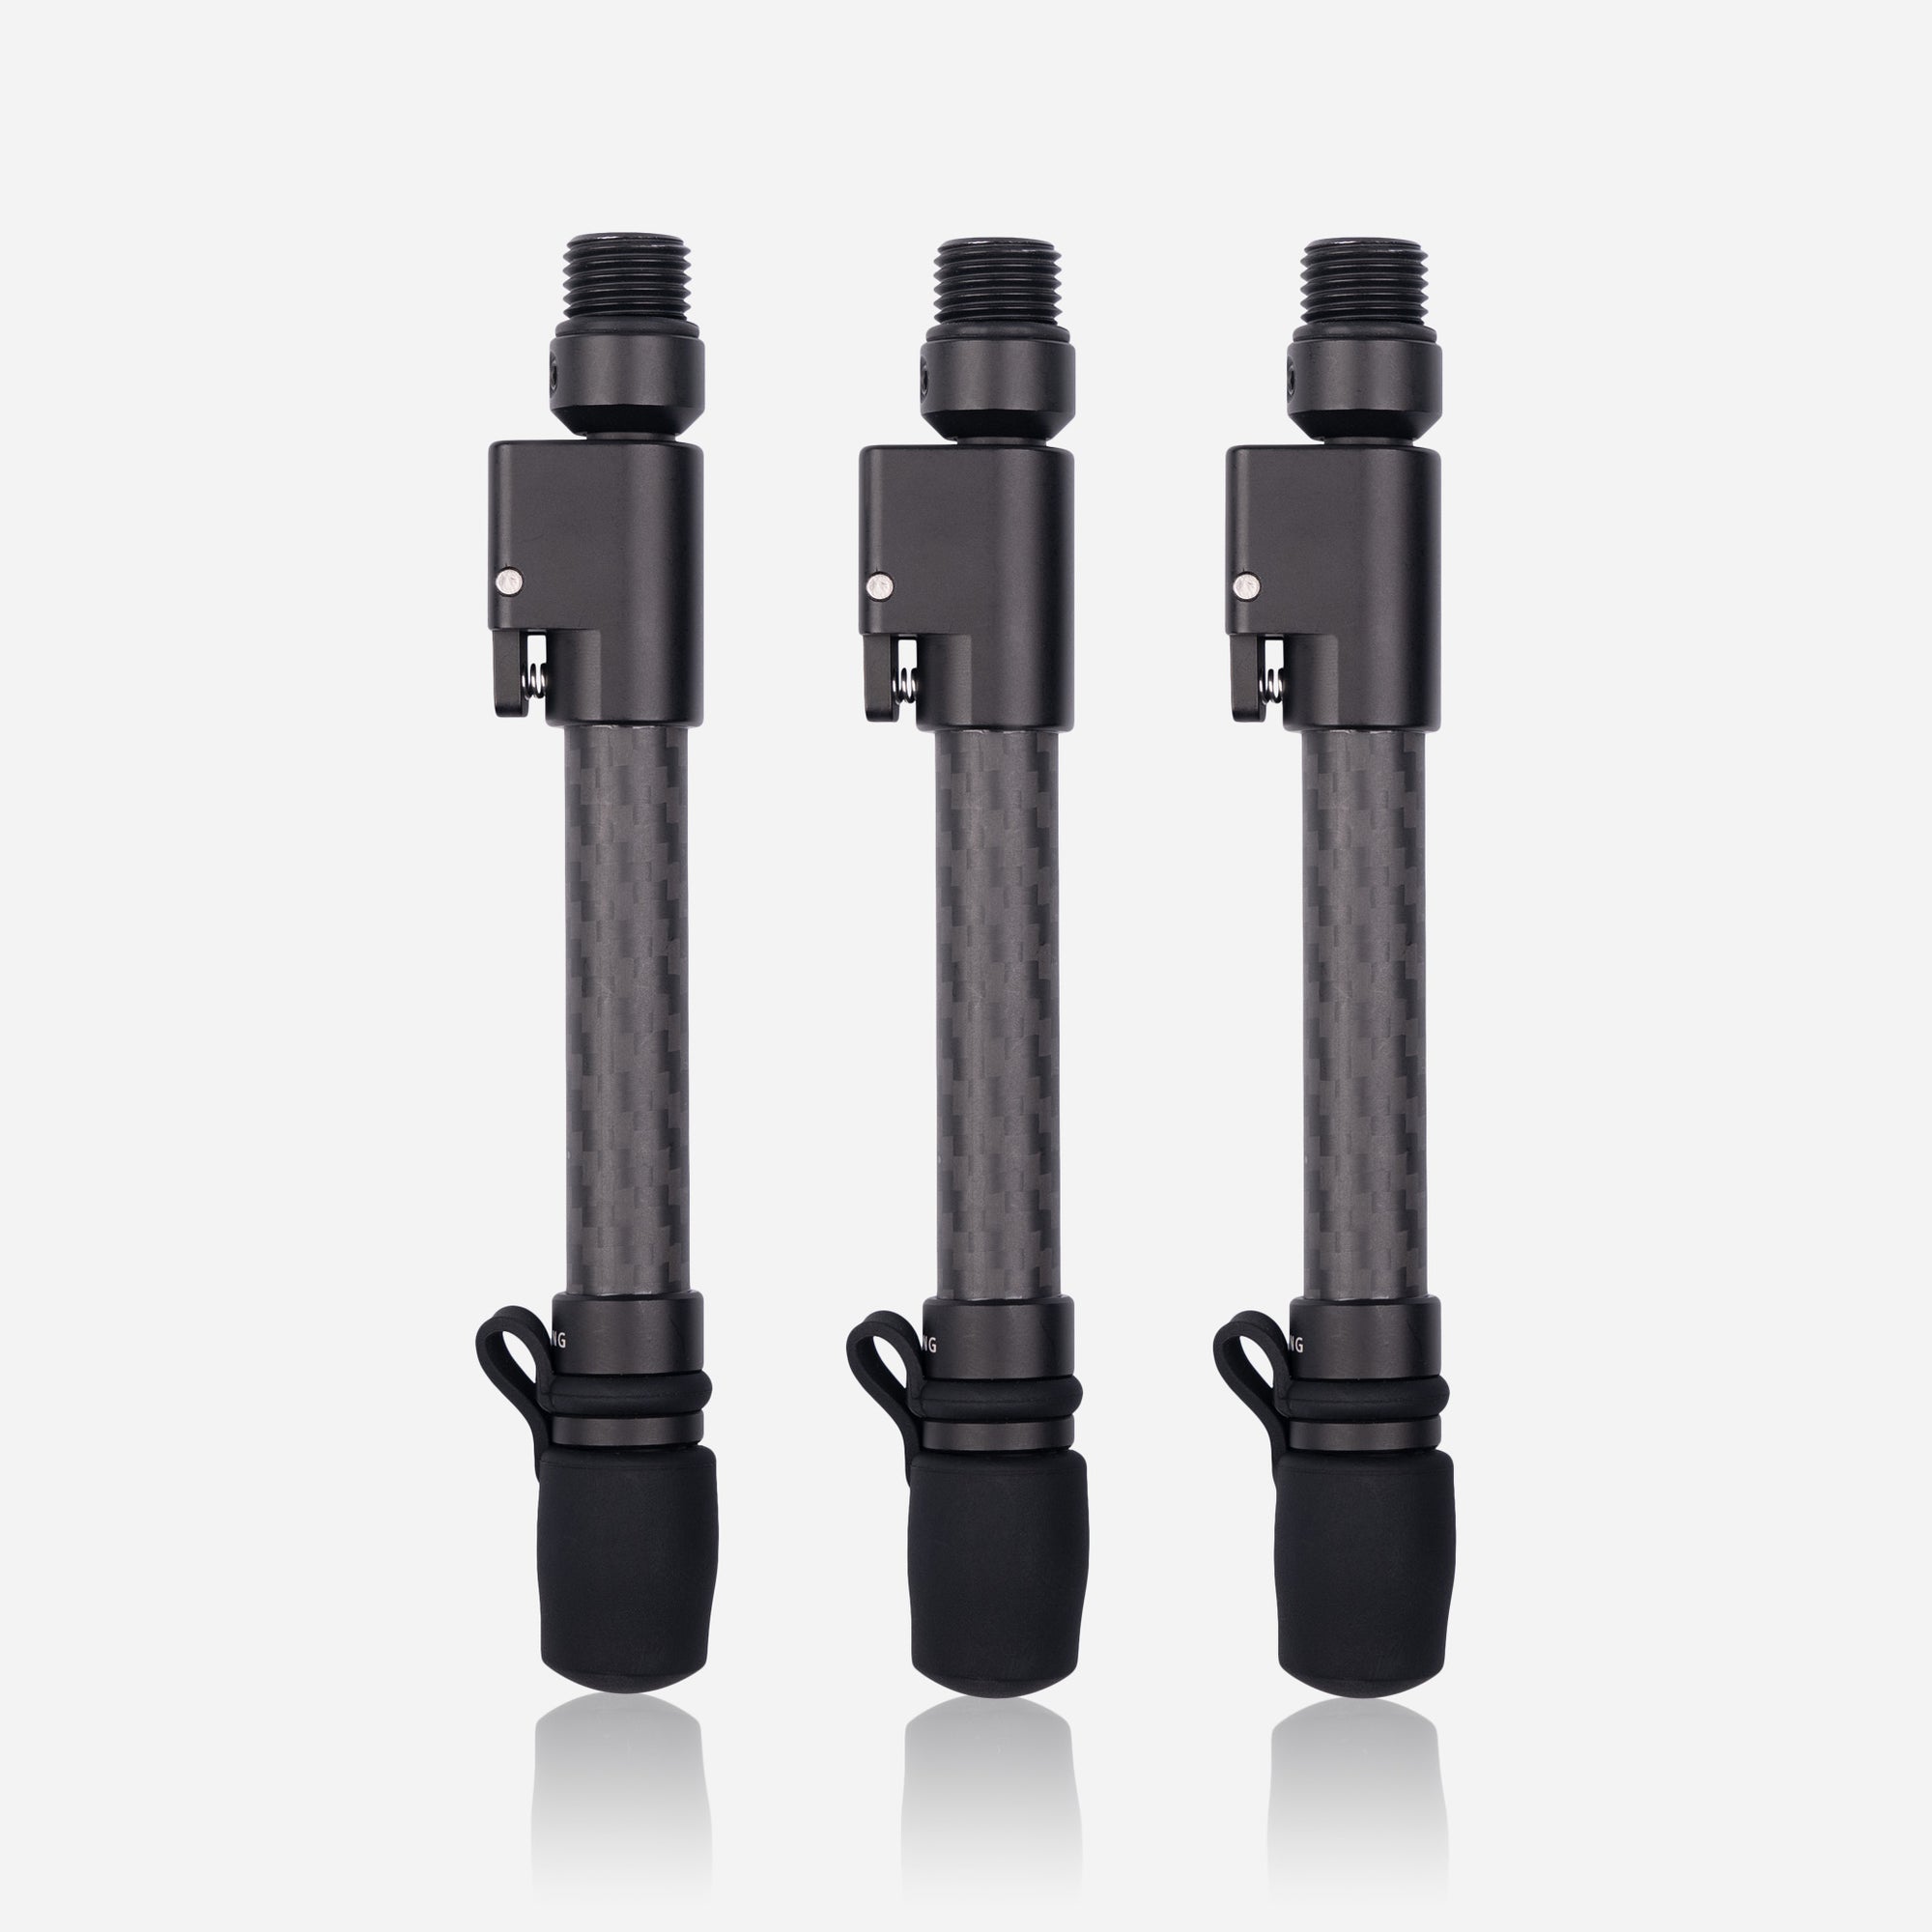
Each leg features a tungsten carbide tip and tethered rubber boot for grip in different environments.
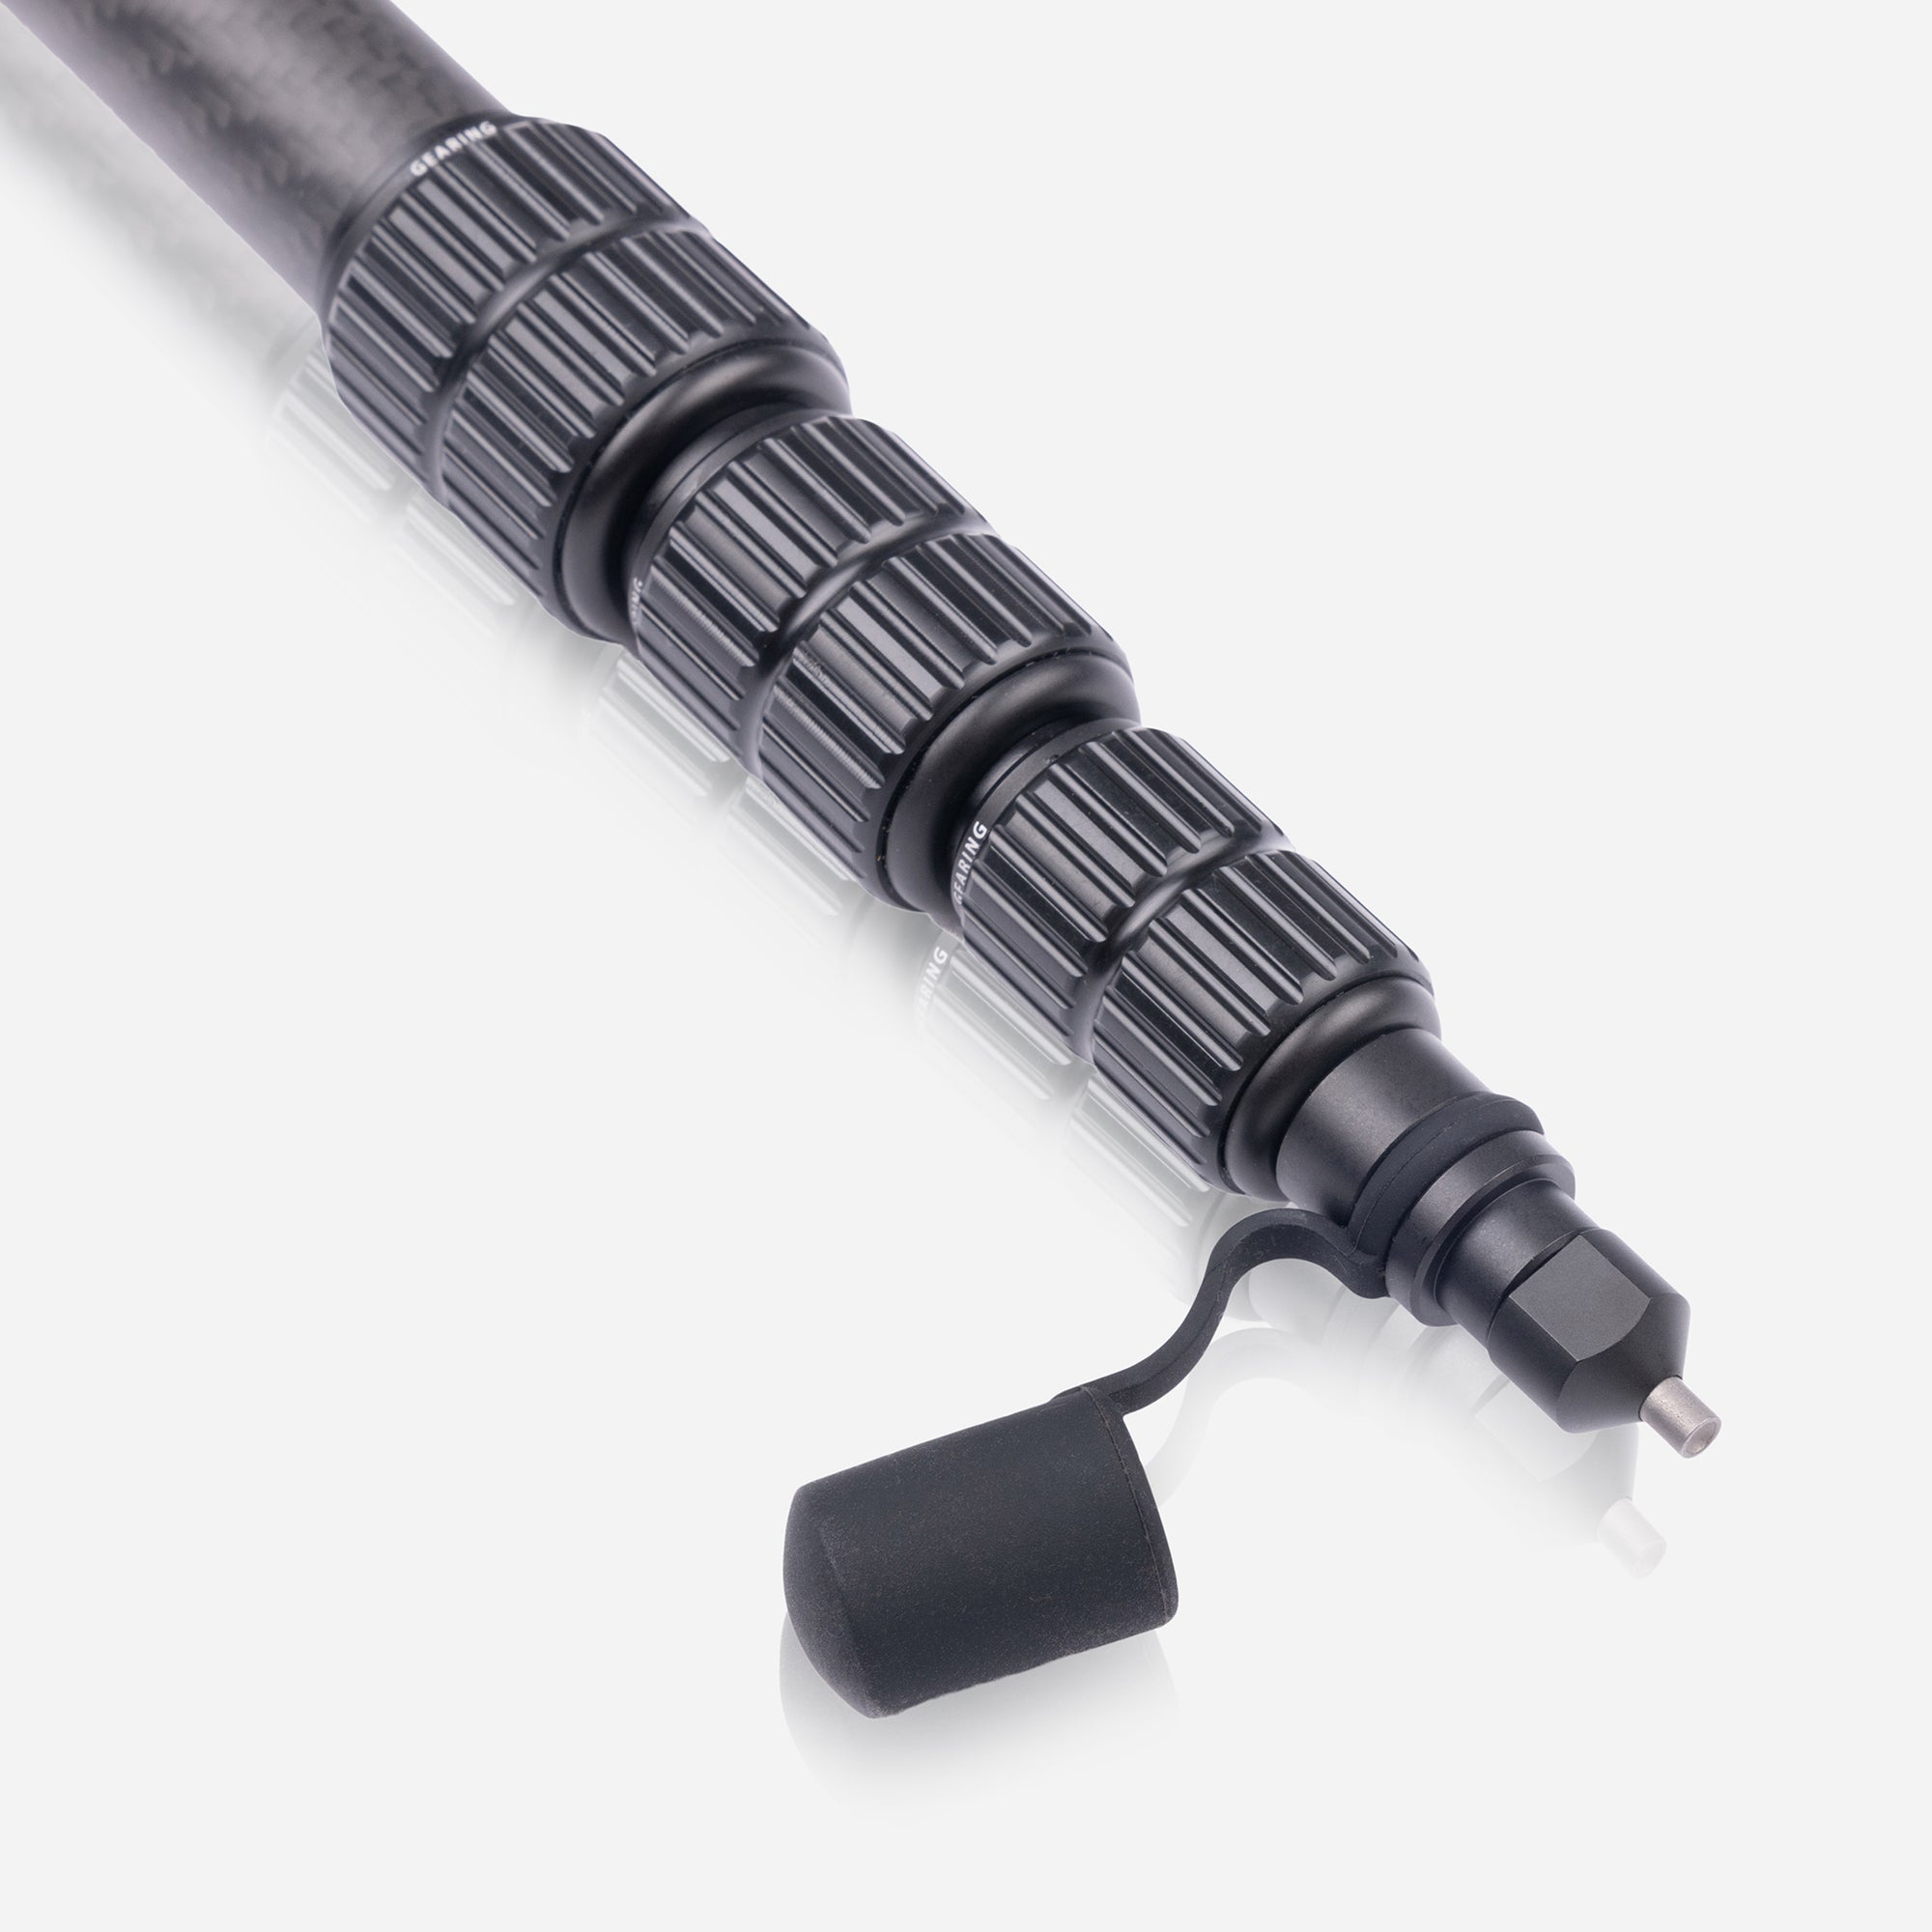
Gently remove the tethered rubber boot
Use the spanner to unscrew the tungsten tips
Screw the trekking pole handles on to the top of the leg
*Product images are for illustrative purposes only and may differ slightly from the actual product*